Connecting JTL Fulfillment Network (FFN)
Last updated
Connecting ChannelDock to JTL Fulfillment Network (FFN) is a fulfillment-center integration. It is not a seller sales-channel connection.
There are two JTL integrations in ChannelDock. Use the one that matches who creates the orders. You can use both if needed.
| Integration | Direction | Use when |
|---|---|---|
| JTL FFN merchant push | ChannelDock → JTL | Orders already exist in ChannelDock and should be sent to JTL Wawi / FFN for fulfillment. |
| JTL FFN order import | JTL → ChannelDock | Outbound orders are created in JTL FFN and should be picked and packed in ChannelDock. |
Do not mix tokens. A merchant API token is not the same as a fulfiller API token.
Before you start
-
The fulfillment center must have a JTL Fulfiller account.
-
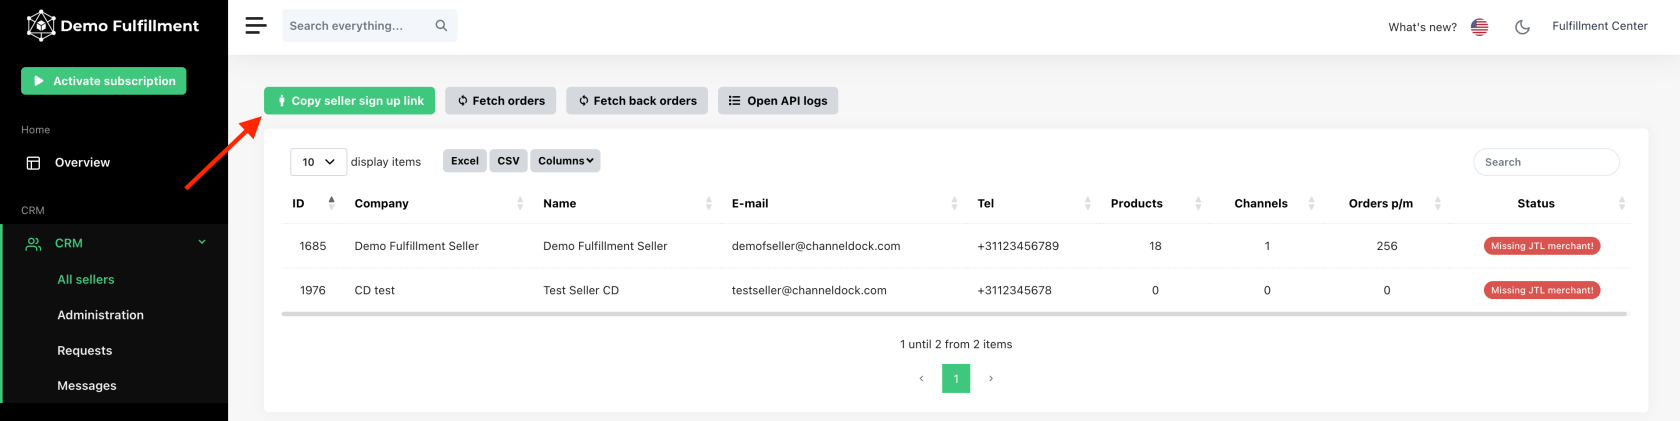
Each merchant must have a ChannelDock seller account. Invite them from CRM → All sellers.
-
Create JTL merchant accounts in JTL, not in ChannelDock.
Connect JTL FFN merchant push
Use this when ChannelDock should send products, orders, and inbounds to JTL.
-
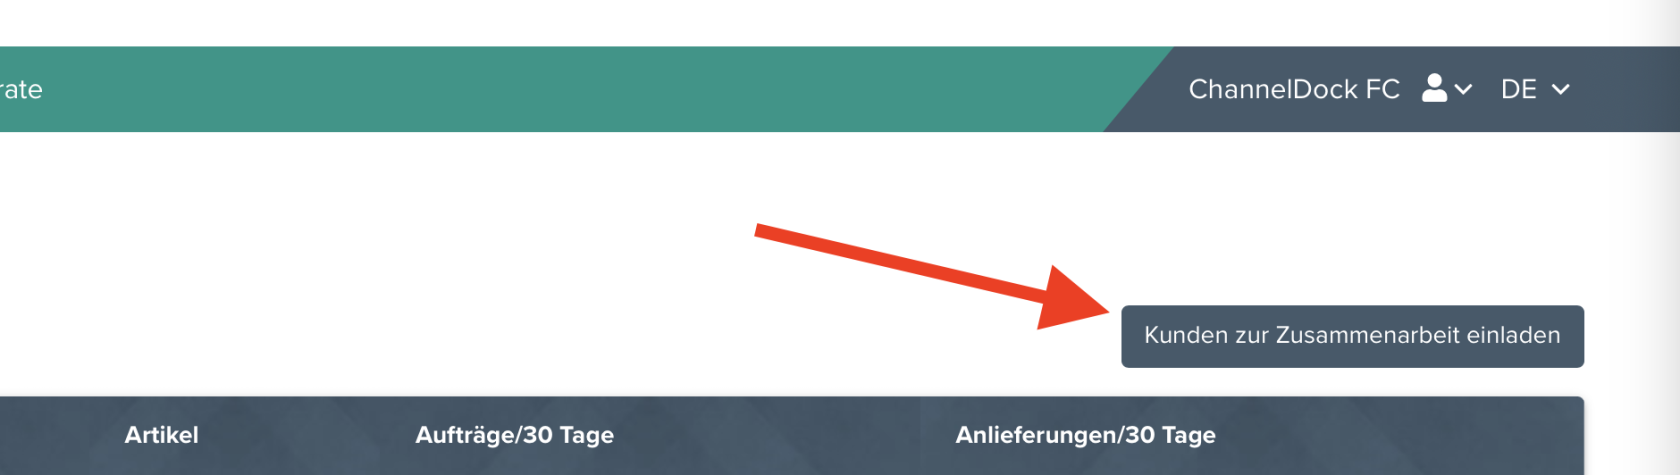
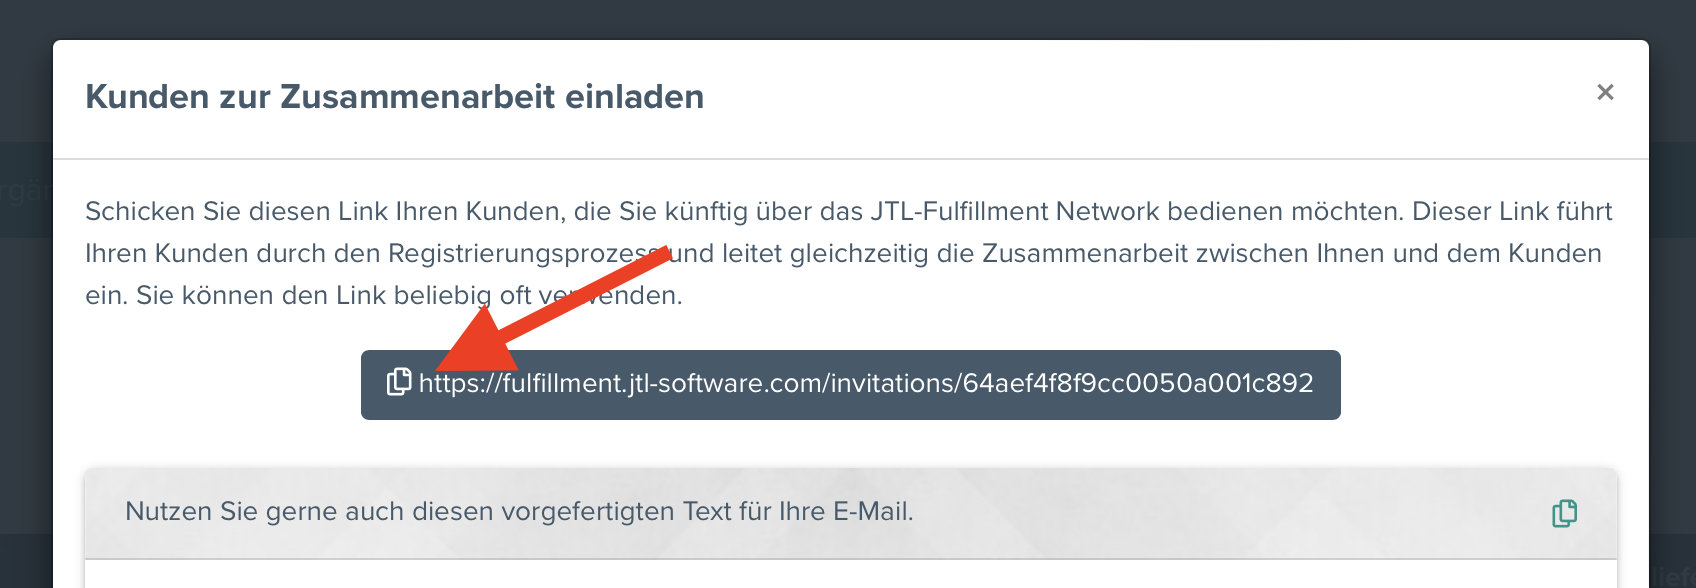
In JTL FFN (logged in as fulfiller), copy the merchant invitation link from Merchants:
https://fulfillment.jtl-software.com/fulfiller/merchants
The link looks likehttps://fulfillment.jtl-software.com/invitations/…Click Kinder zur Zusammenarbeit einladen, then copy the link:
-
In ChannelDock go to Settings → Integrations.
-
Open JTL FFN merchant push.
-
Paste the invitation link and click Connect JTL.
-
The connection appears in the integrations table. The URL on that row is the invitation merchants must accept.
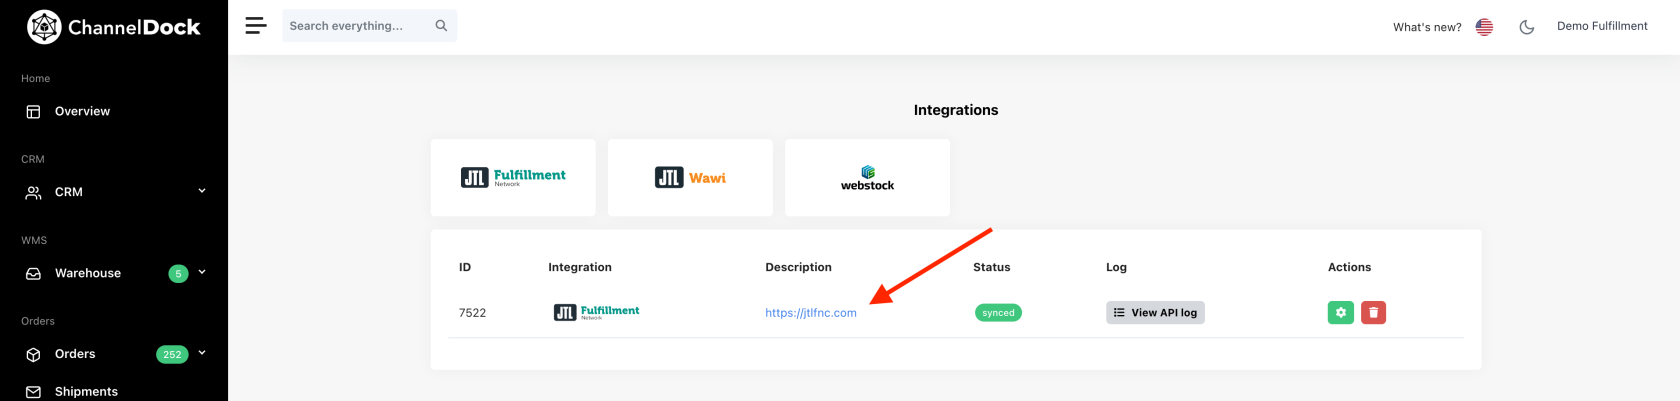
Connecting the invitation link only stores the invitation. Each seller still needs a merchant API token.
Connect a seller merchant token
Do this after the seller has a ChannelDock seller account.
-
Create a JTL merchant account:
https://kundencenter.jtl-software.de/login/registrierung
Use the merchant’s email address.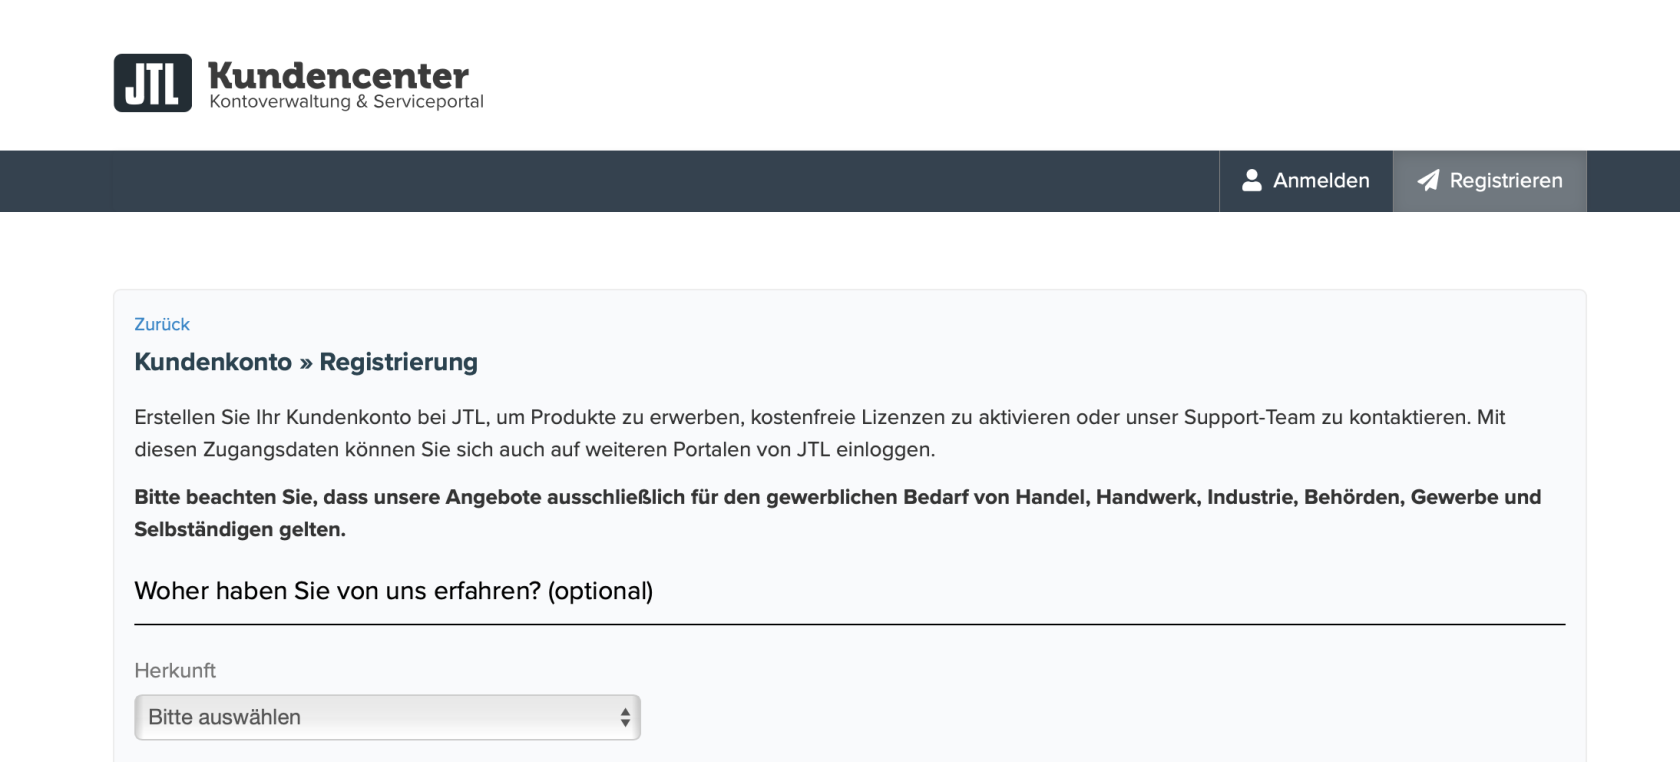
-
Sign in to JTL FFN as Merchant:
https://fulfillment.jtl-software.com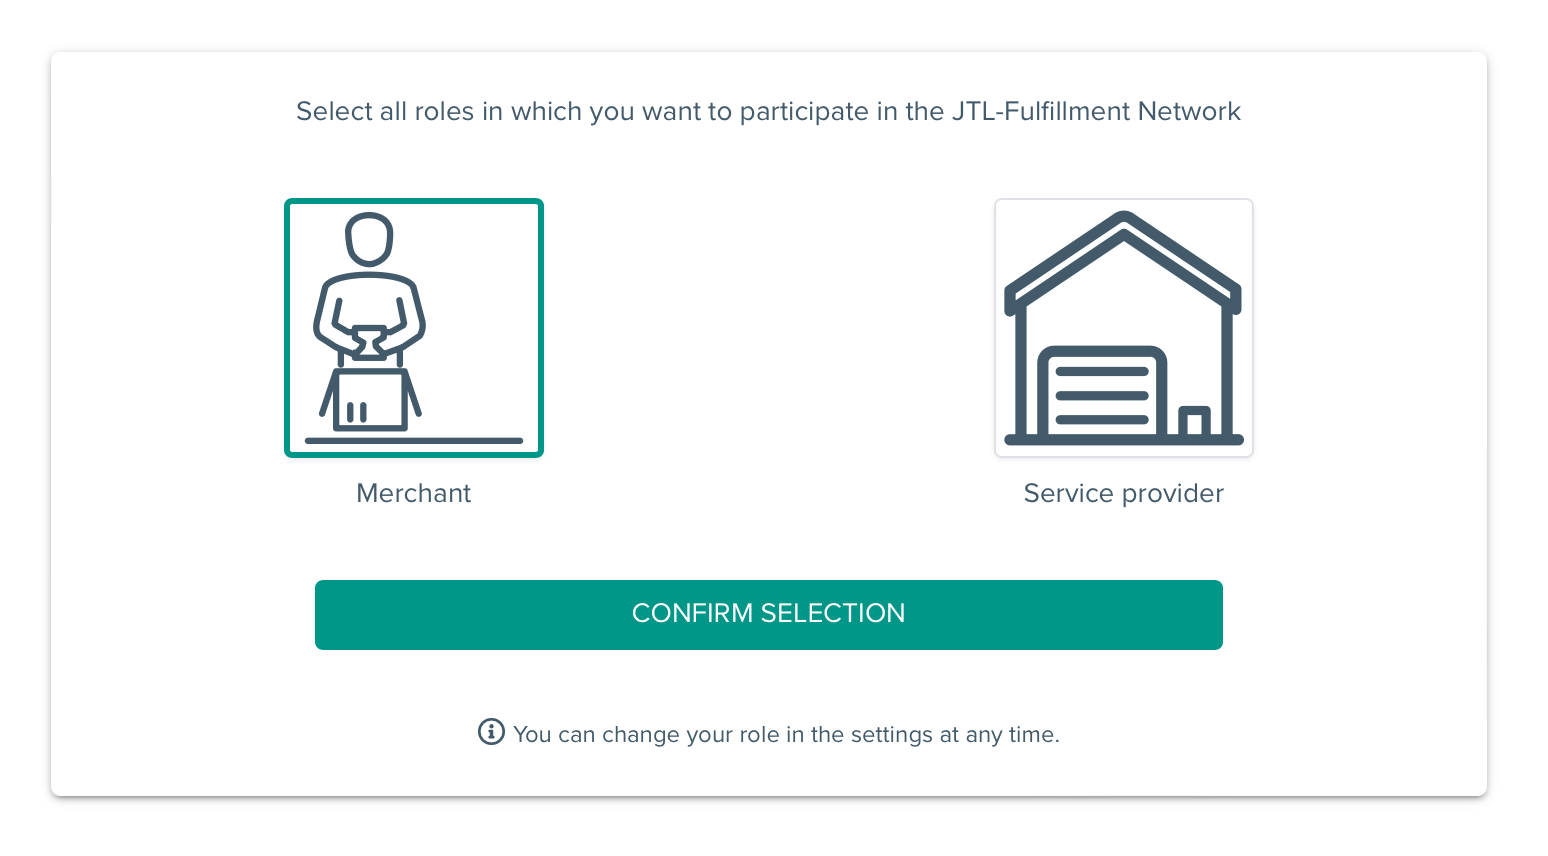
-
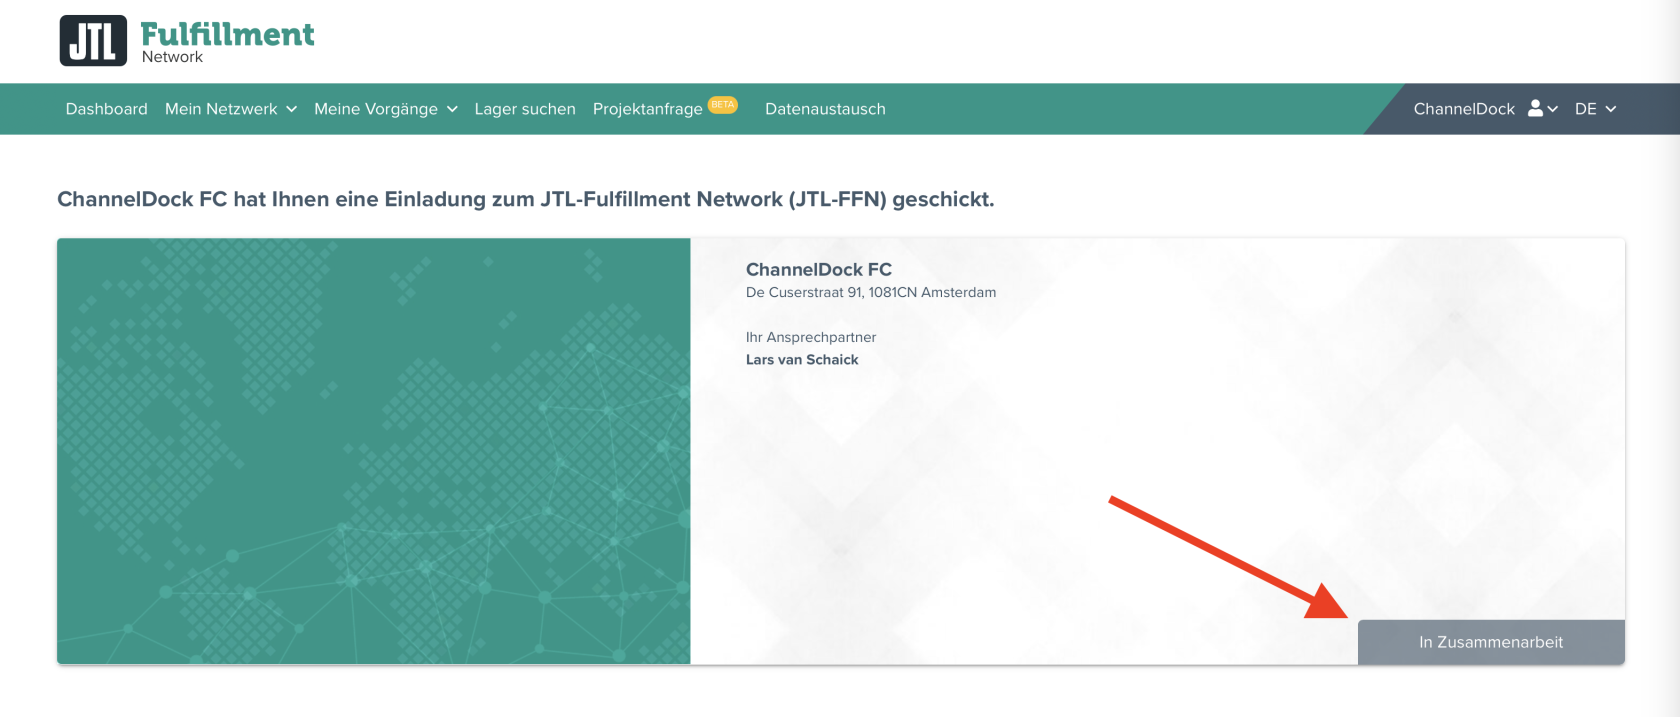
In ChannelDock, open Settings → Integrations and click the invitation URL on the JTL merchant-push connection. Accept the invitation in JTL so the merchant is linked to the fulfiller.
-
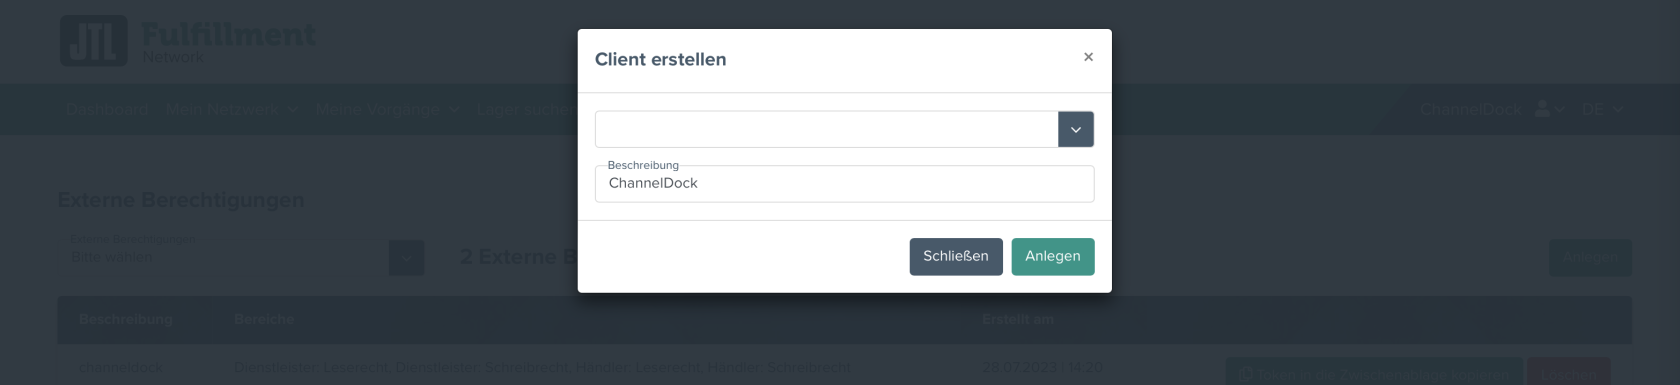
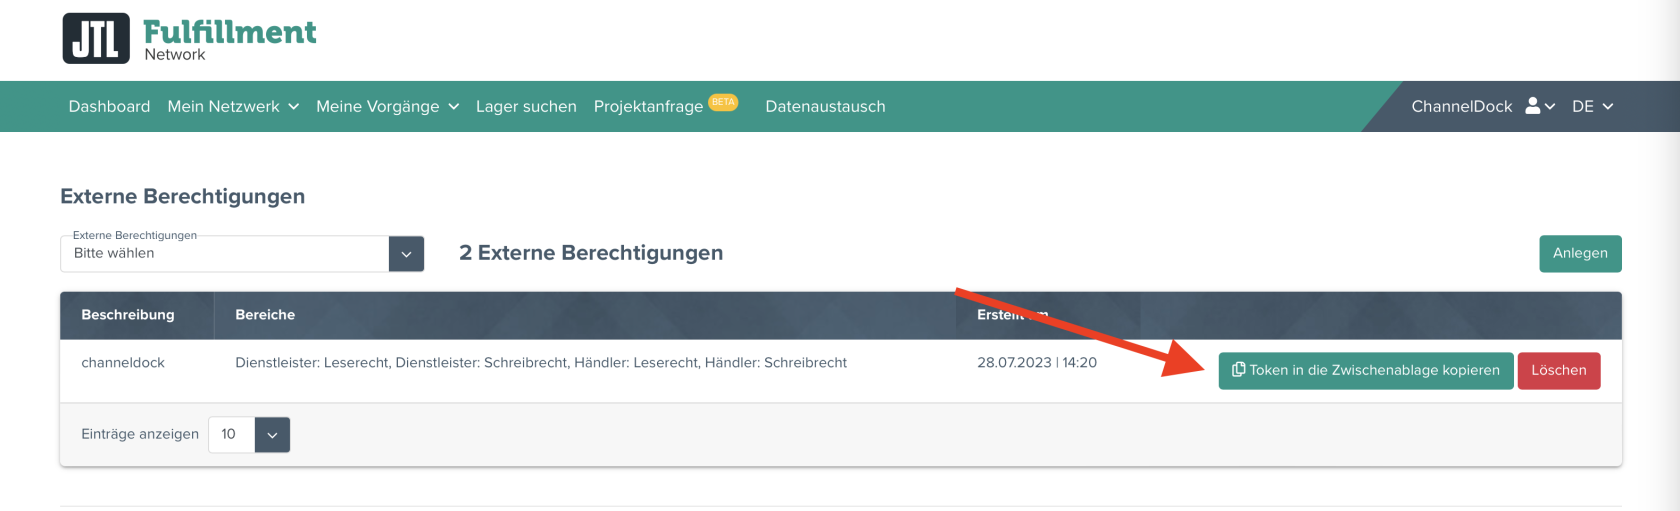
Create a ChannelDock API token while logged in as the merchant:
https://fulfillment.jtl-software.com/extern-access/YCEY0XCHANNELDOCK -
Leave the dropdown empty. In the name field enter ChannelDock. Click Anlegen (create).
-
Copy the token.
-
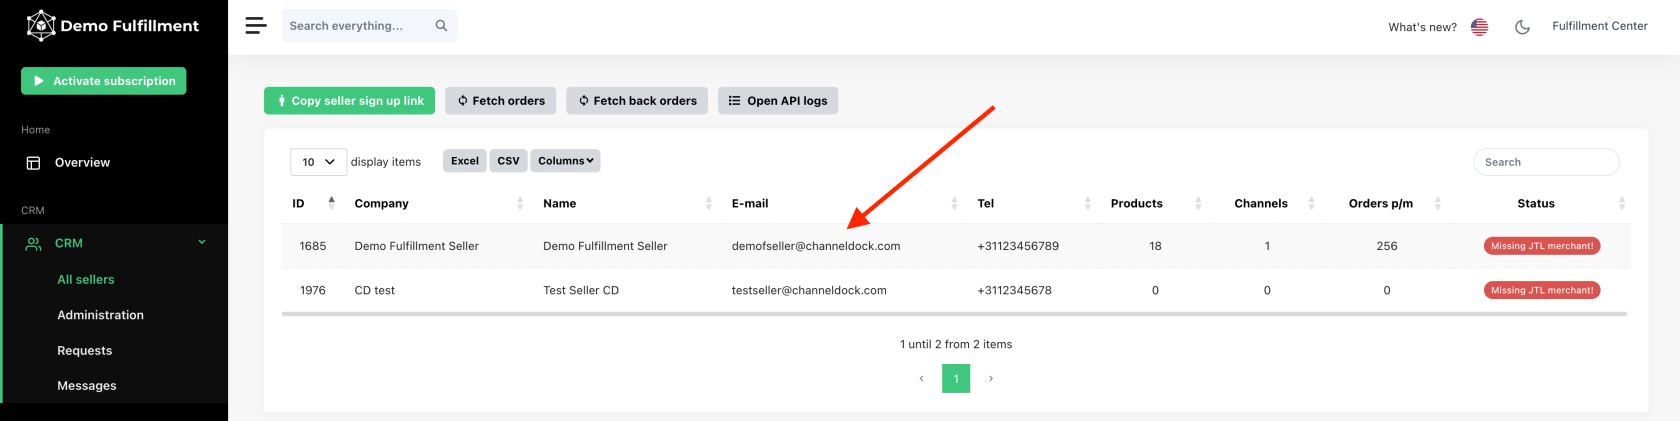
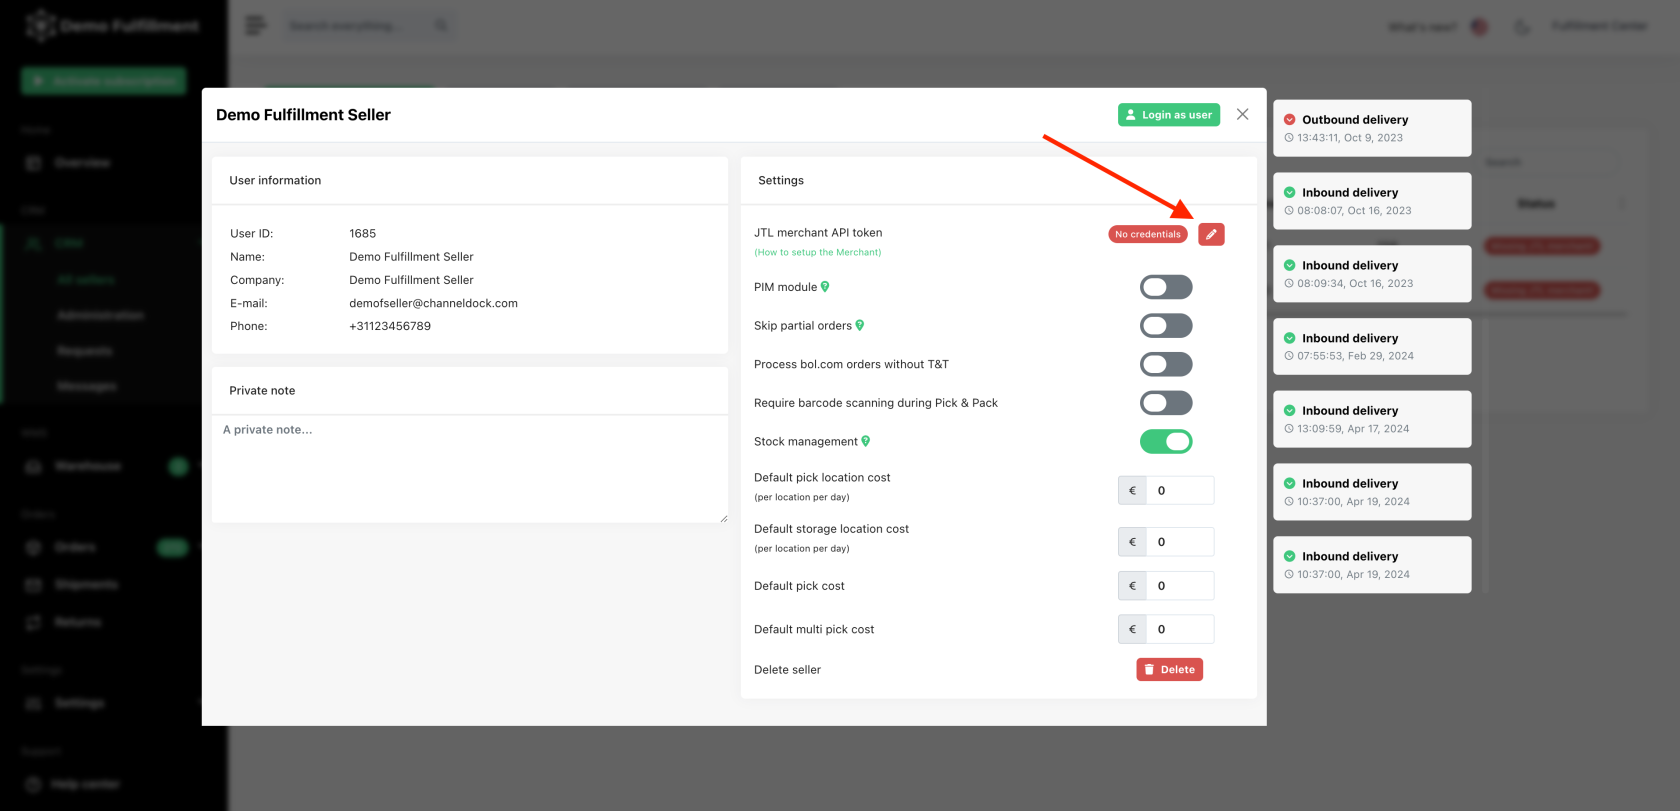
In ChannelDock go to CRM → All sellers, open the seller, click the pencil icon, and paste the token in JTL merchant API token.
-
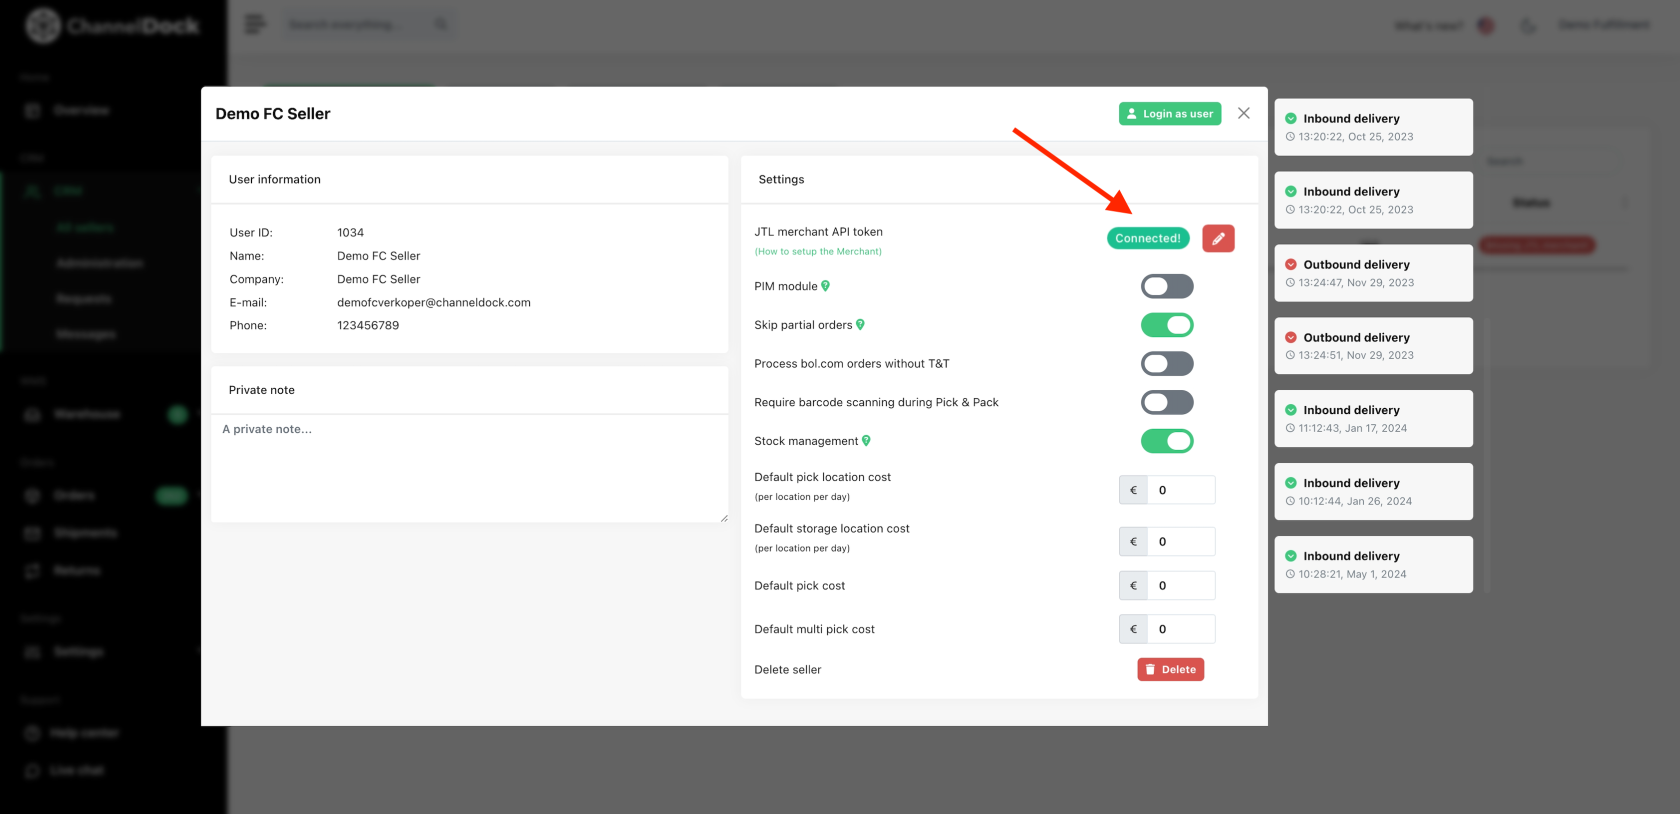
If the token is valid, ChannelDock shows Connected.
Then assign a warehouse and shipping methods to the merchant in JTL Wawi / FFN. ChannelDock cannot push orders until those exist in JTL.
After a successful merchant connection:
- ChannelDock sends the seller’s products that are available at the fulfillment center to FFN.
- Open orders in ChannelDock are sent to JTL (after a short delay so incomplete orders are not sent).
- Inbound shipments can be sent to FFN once a warehouse is assigned.
- Stock, shipments, tracking, and shipping methods sync from JTL back to ChannelDock.
Connect JTL FFN order import
Use this when JTL creates outbound orders and ChannelDock should import them.
- Create a fulfiller API token in JTL FFN (fulfiller account).
- In ChannelDock go to Settings → Integrations.
- Open JTL FFN order import.
- Paste the fulfiller API token and click Connect JTL.
- On each seller, map the JTL FFN merchant.
- Authorize a JTL FFN warehouse and shipping methods for that seller.
JTL requires at least one Standard (package) shipping method on warehouse authorization. Pallet or label-provider methods alone are not enough.
After this connection, ChannelDock can import outbounds, products, inbounds, stock, shipments, and returns from JTL. When the fulfillment center receives an inbound in ChannelDock, the receipt is posted back to JTL.
Error: 401 Unauthorized on users/current
You may see:
Client error: GET https://ffn.api.jtl-software.com/api/v1/users/current resulted in a 401 Unauthorized response
This happens when saving the JTL merchant API token on a seller (CRM → All sellers). ChannelDock immediately checks the token with JTL.
401 Unauthorized means JTL rejected the token. This is not a ChannelDock outage.
Common causes:
- A fulfiller token was pasted into the seller merchant token field.
- The token was created with the dropdown filled. The dropdown must stay empty.
- The token was created while logged into the fulfiller JTL account instead of the merchant account.
- The ChannelDock token URL was not used.
- The merchant has not accepted the invitation yet.
- The token was copied incompletely, has extra spaces, or was revoked.
How to fix it:
- Log out of JTL if you are in the fulfiller account.
- Log in as the merchant.
- Confirm the invitation was accepted.
- Open https://fulfillment.jtl-software.com/extern-access/YCEY0XCHANNELDOCK
- Leave the dropdown empty, name the token ChannelDock, and create a new token.
- Paste the new token on the seller in ChannelDock.
Fulfiller API tokens belong only under Settings → Integrations → JTL FFN order import. They will always fail with 401 if used as a seller merchant token.
Checklist if orders or stock do not sync
- The seller has a ChannelDock account and is connected to the fulfillment center.
- The invitation was accepted in JTL.
- The seller has a valid merchant token (Connected).
- The merchant has a warehouse and shipping methods in JTL.
- For order import: the seller is mapped to a JTL FFN merchant and has at least one Standard shipping method authorized.
- Check the integration gear settings and View API log on Settings → Integrations.
Was this helpful?