Lesson 2 of 19 · Getting started
Get your scanner and printer ready
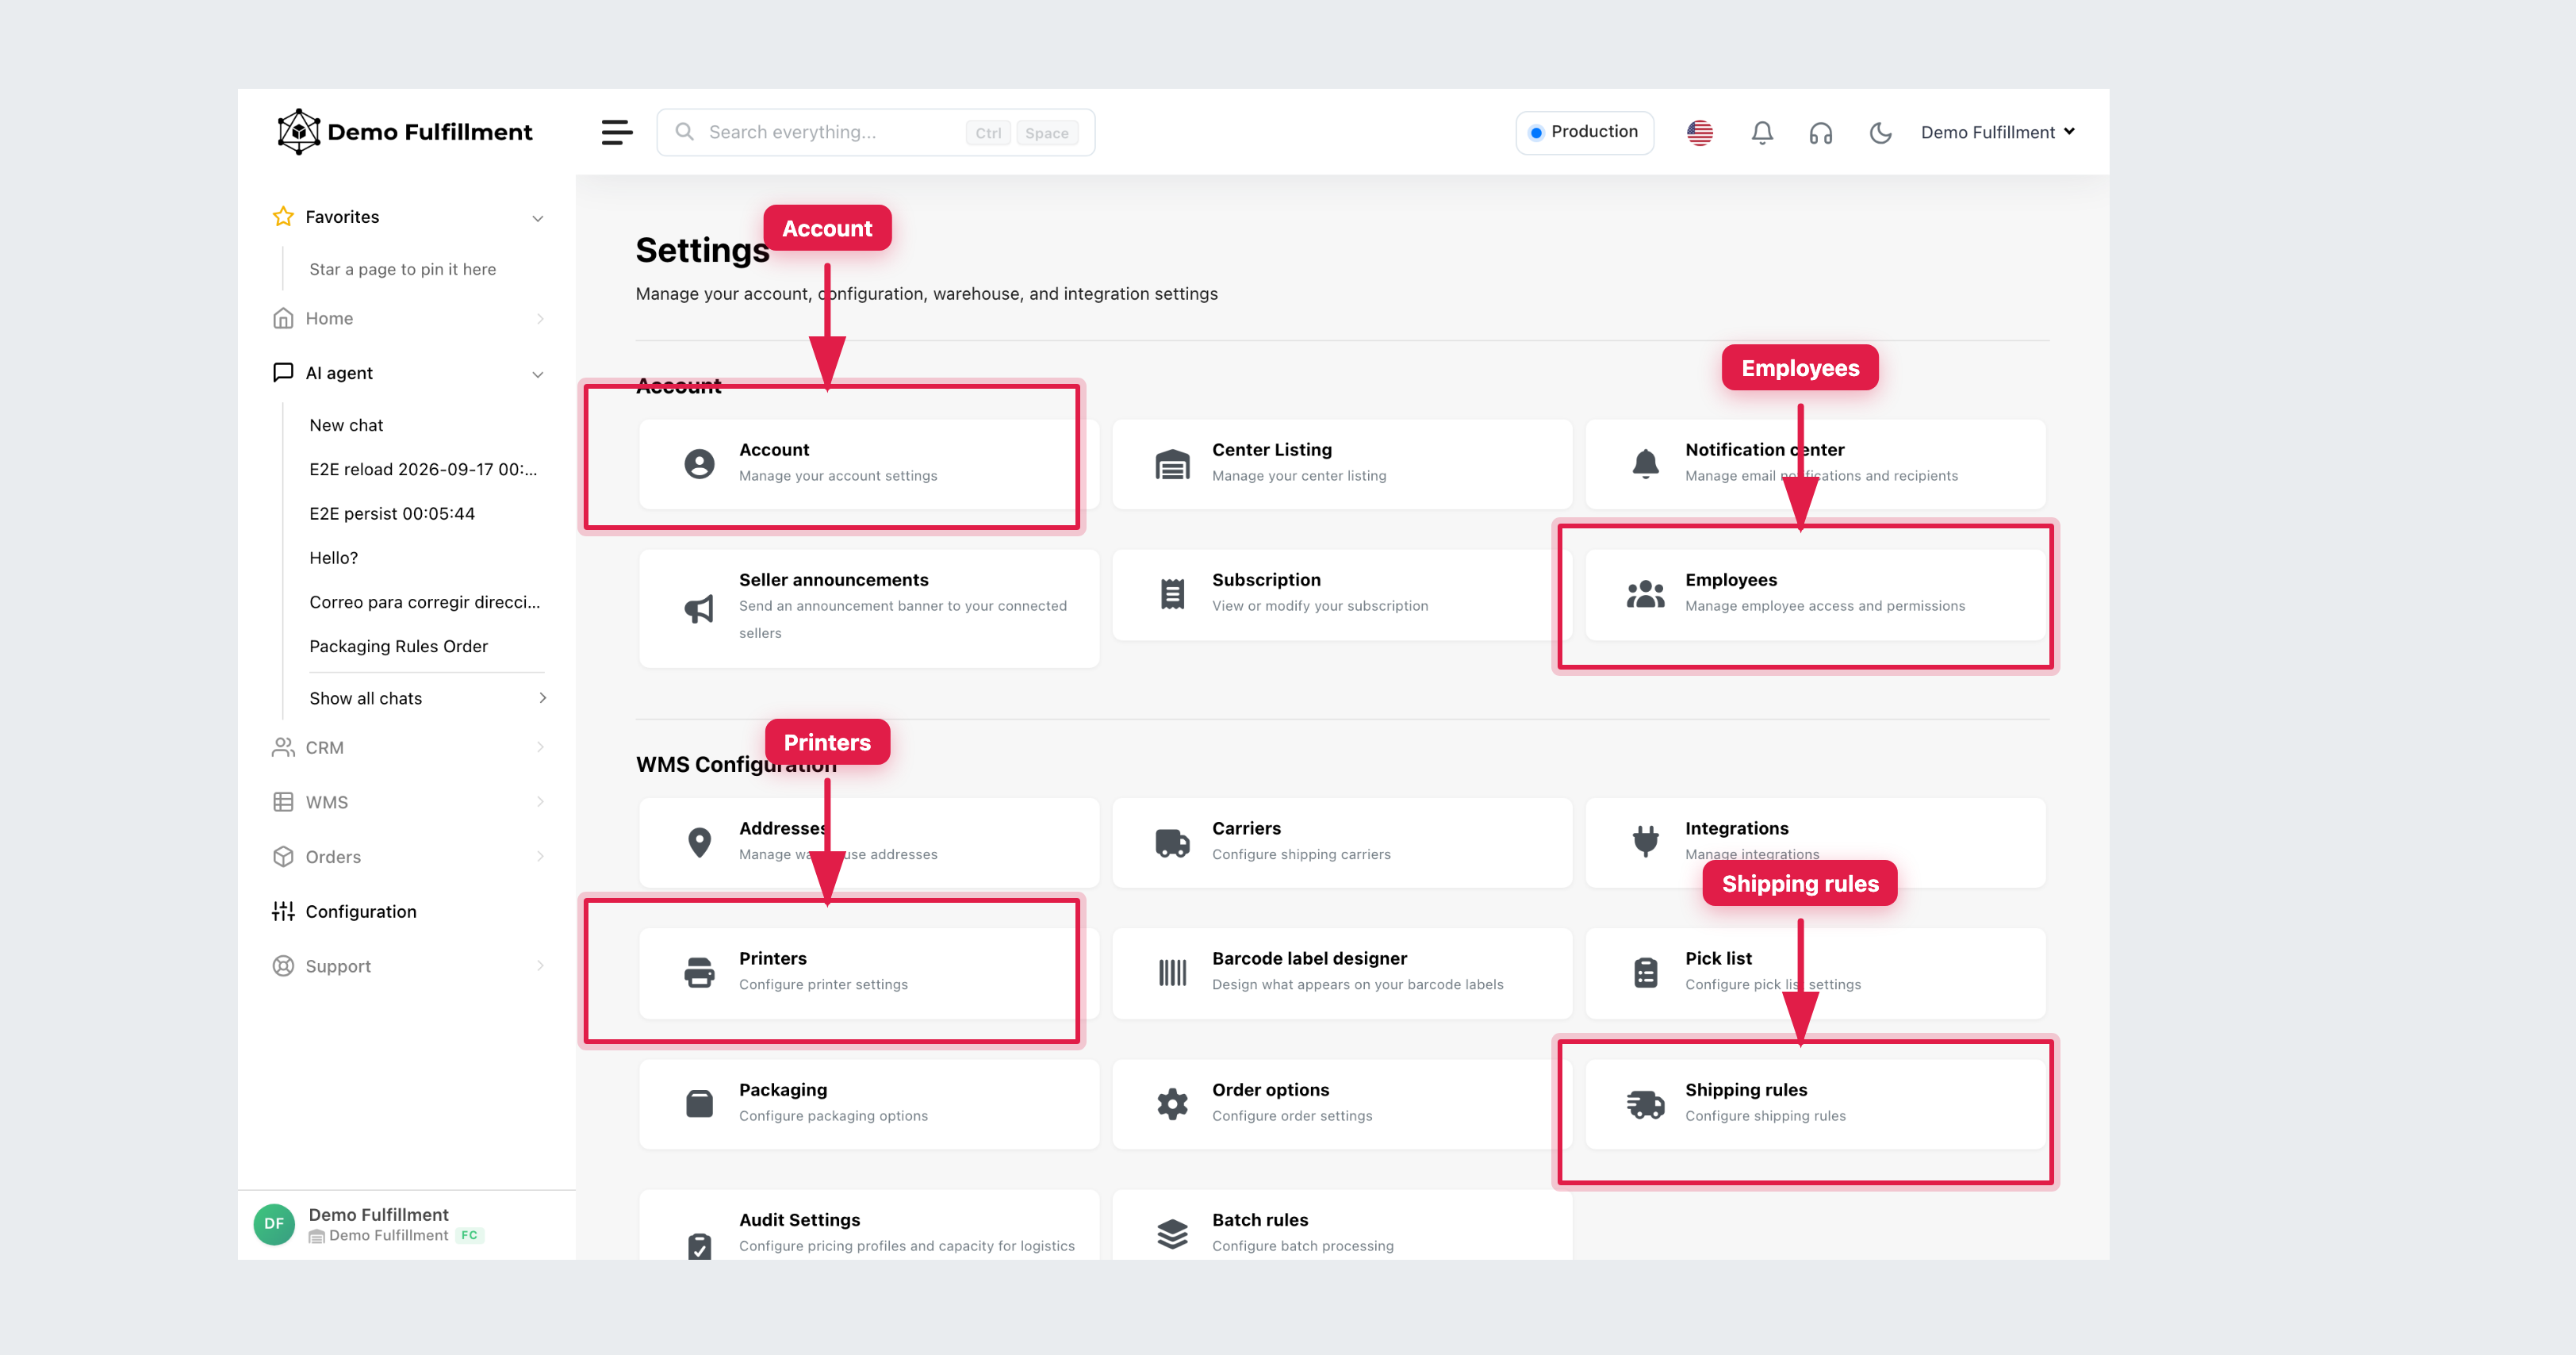
How to: scan a barcode and check Configuration → Settings → Printers.
Do this before you pick or receive. Connecting PrintNode is an administrator task under Configuration → Settings.
Scanner
- Connect the scanner and check the battery or cable.
- In ChannelDock, scan a known product barcode (for example in WMS → All products search, or the Scan and search field on Pick & Pack). It should fill the field as if you pressed Enter.
- If nothing appears, check the connection. For Zebra issues, a supervisor may reset DataWedge.
Use Search everything… (Ctrl + Space) at the top of the app when you need to find an order, product or serial quickly.
Printer
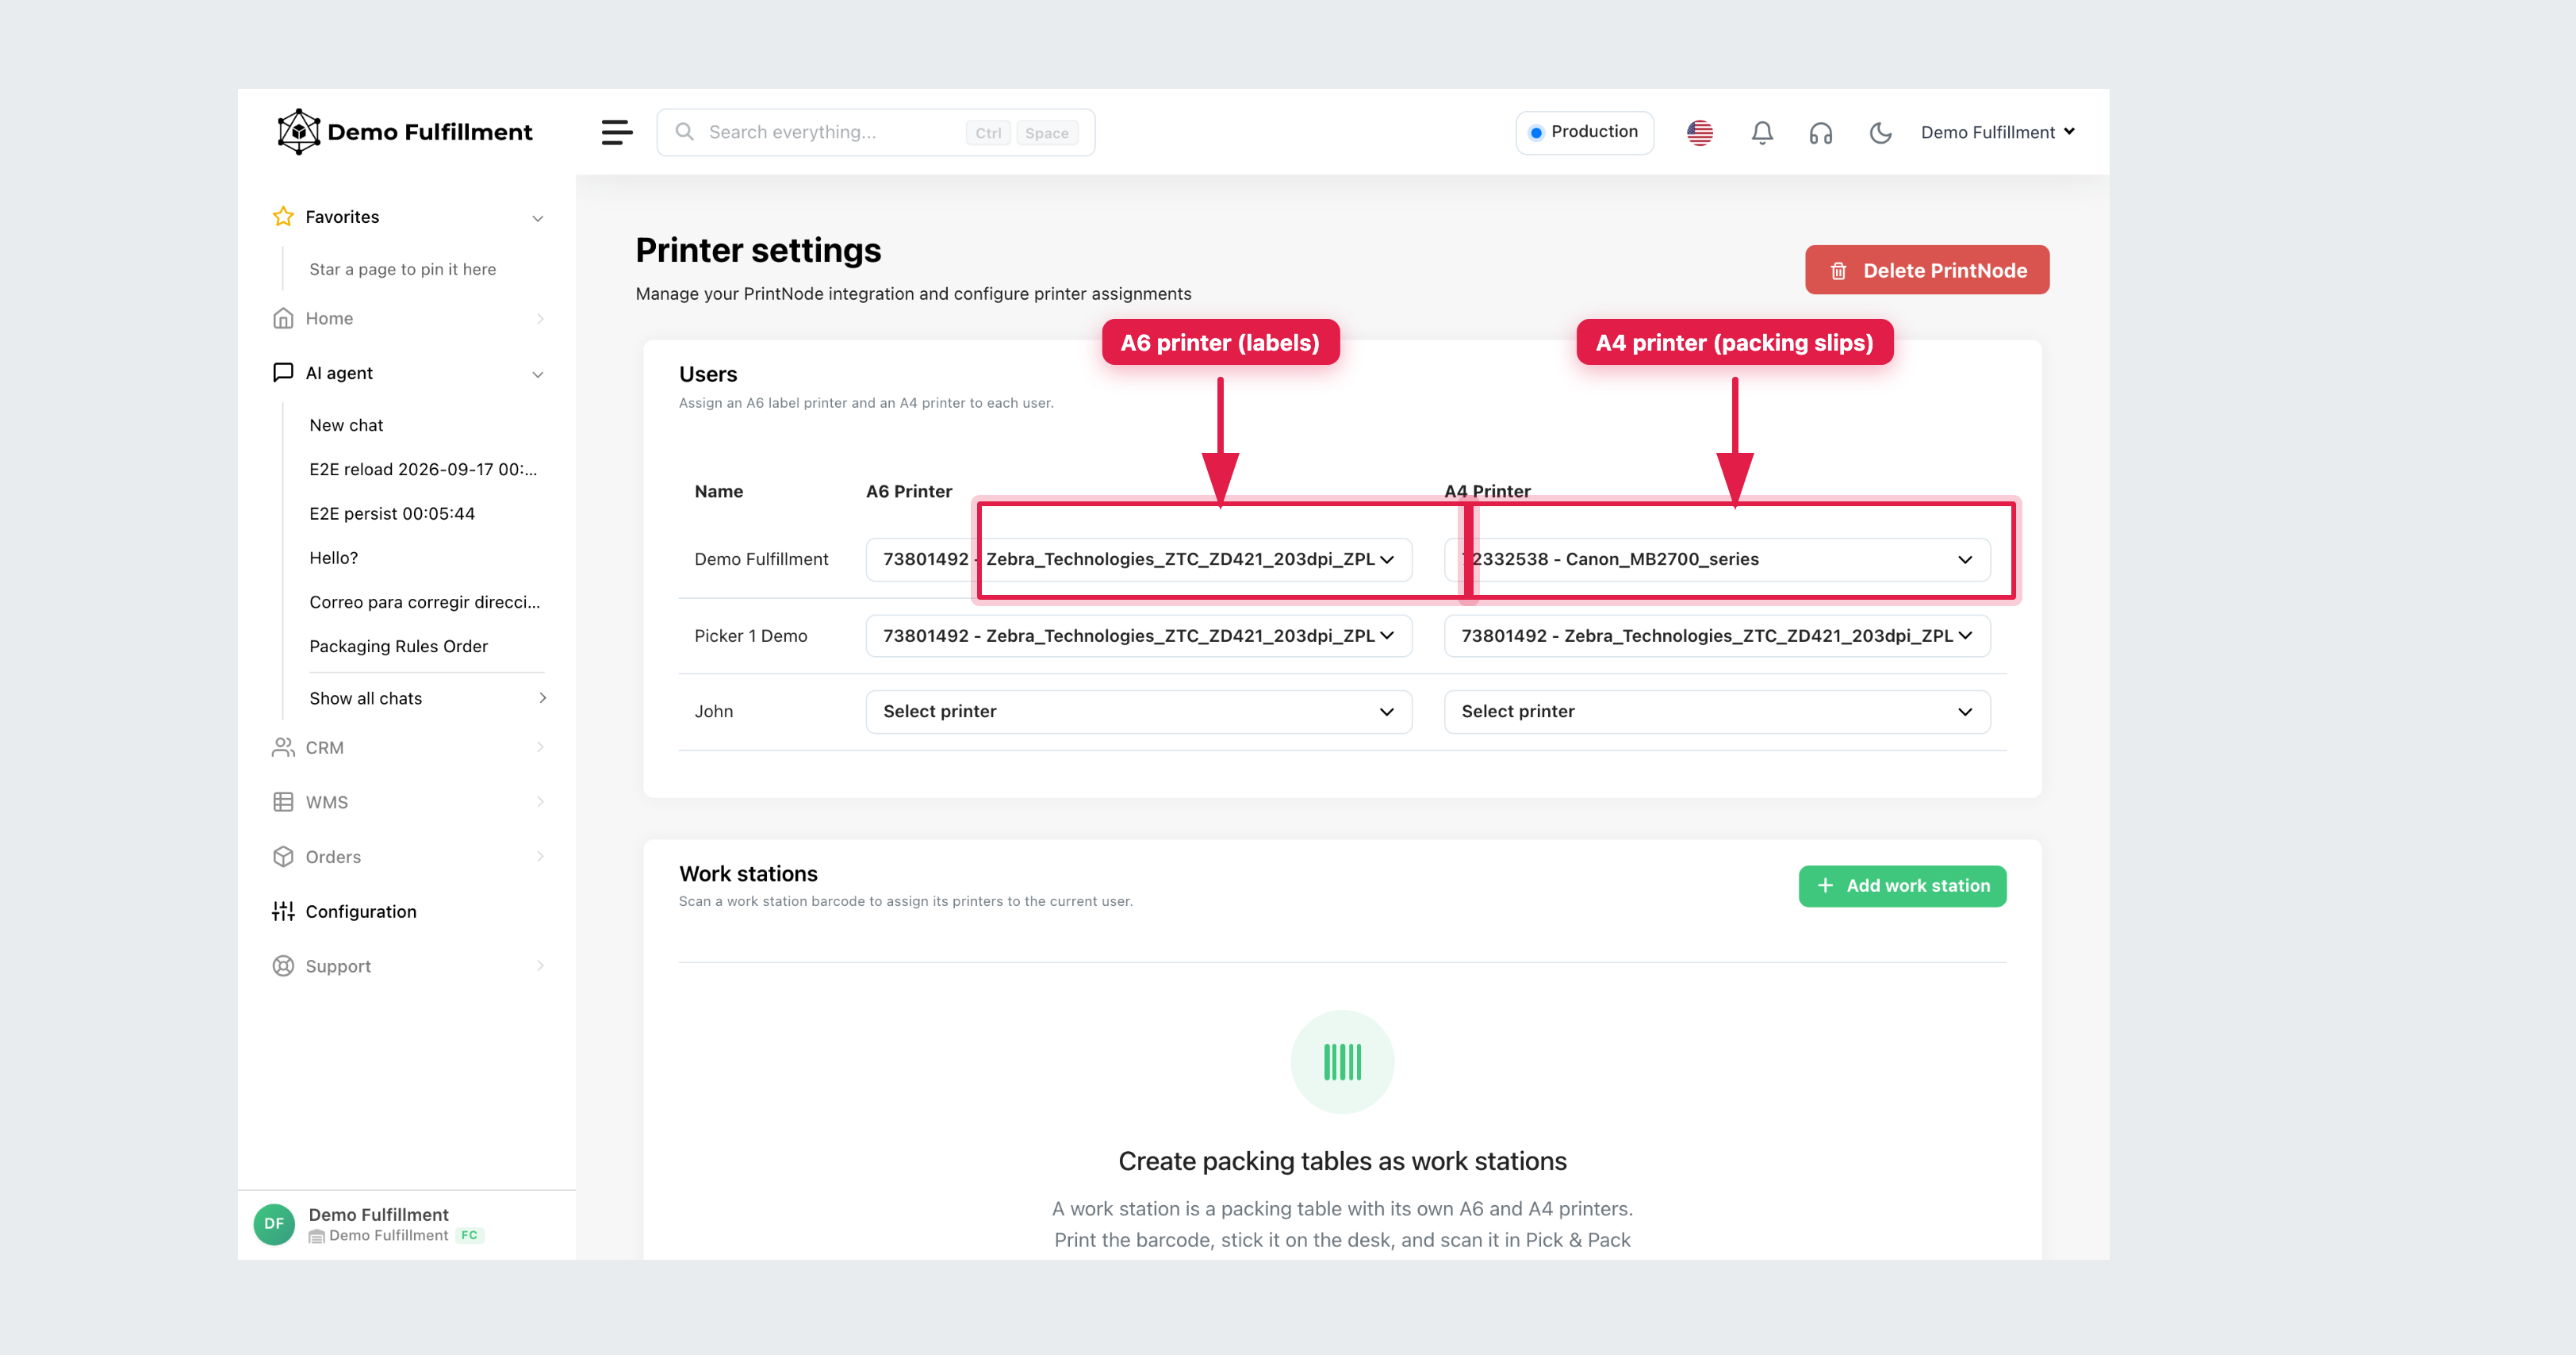
Printers are assigned per user on Configuration → Settings → Printers (Printer settings): A6 Printer (labels) and A4 Printer (packing slips). Connecting or deleting PrintNode is for administrators.
- Load label stock the right way round.
- Confirm your name has the printers for your station. If you have the Change Printer right, you can switch the dropdowns. Work stations let a supervisor map a packing table barcode to A6/A4 printers.
- Do an approved test: reprint or download an existing packing slip from an order (More actions → Print packing slip). Do not create a new shipment only to test paper.
More help: Barcode Scanners · Connecting PrintNode
Was this helpful?