Getting started as a warehouse employee
This guide is a how-to for the fulfillment center app. It follows the same left menu you use every day. Sign in with your own employee account. You only see the items your supervisor enabled.
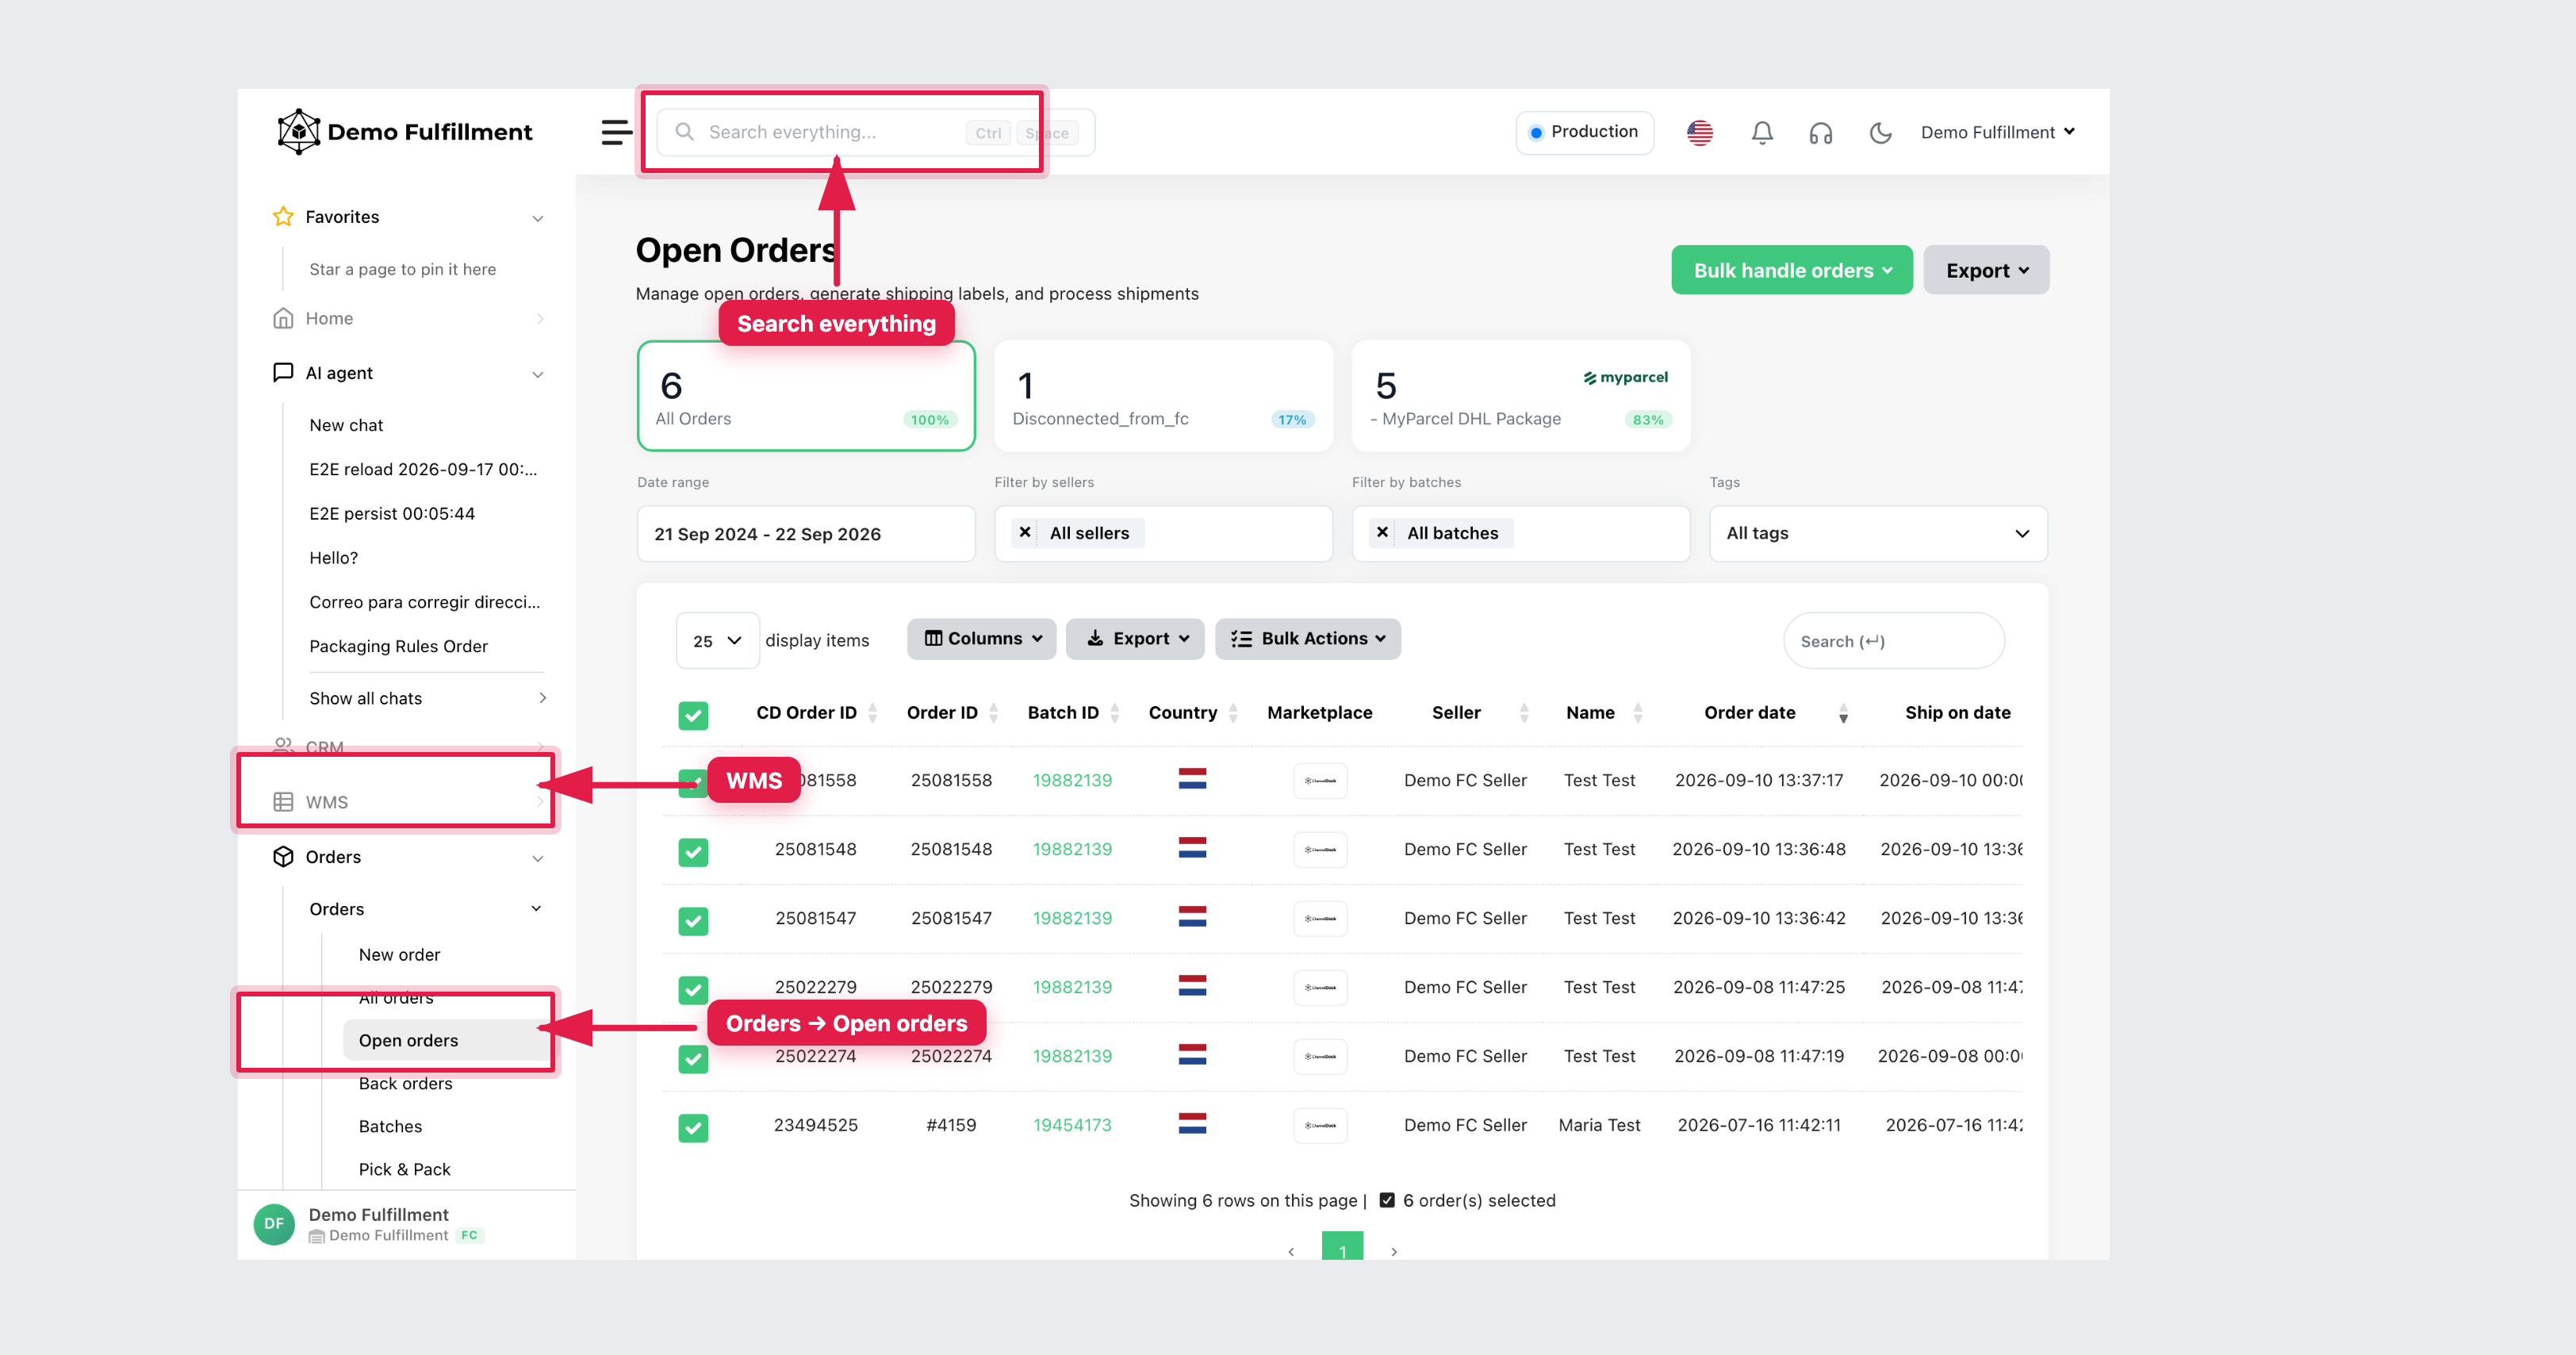
How the menu works
The bar on the left is the product. Click a group to open its screens. The top bar has Search everything… (Ctrl + Space) — type an order ID, EAN, SKU or serial. Click your name (top right) for My account and Sign out.
| Menu | What it is | How-to lessons |
|---|---|---|
| Home | Dashboard: orders, shipments, inbounds, returns for today | Start here after login |
| CRM | Sellers, messages, tasks, optional Login as user | Sellers · CRM · Seller account |
| WMS | Products, locations, transfers, inbound/outbound deliveries | Products, Deliveries, stock change, Stock transfer |
| Orders | Open / All / Back orders, Batches, Pick & Pack, Shipments, Returns | The Orders lessons below |
| Configuration | Account, Employees, Printers, Shipping rules | Account + printers, then Shipping rules |
| Support | Help chat, tickets, changelog | Troubleshoot |
You may also see Stock advice, Packing bins, New order or B2B. Skip those unless your supervisor uses them.
5-minute demo (click through once)
Do this with a colleague the first day. Do not create labels or change stock unless they say so.
- Home — open the dashboard. Note the four tiles (orders, shipments, inbounds, returns).
- Search everything… (Ctrl + Space) — type one order ID or EAN and open the result.
- WMS → All products — set Filter by sellers, open a product. Read seller, location and Free.
- WMS → Deliveries — open one Inbound row. See the lines. Do not click Accept & stock delivery.
- Orders → Open orders — open one order. Read seller, IDs, comment, shipping method. More actions → Open in Pick & Pack (or go to Orders → Pick & Pack).
- Orders → Shipments — find a tracking number. That is a reprint, not a new label.
- Configuration → Settings → Printers — check your A6 and A4 printers.
Then work the lessons for the screens you will use.
Before every action
Confirm seller, product (EAN/SKU), order (CD Order ID and Order ID) and location.
Lesson list
Lessons follow the ChannelDock menu. Skip CRM and Configuration unless those items are on your account.
Getting started
Sign in, printers, and Search everything.
WMS
All products · Stock locations · Stock transfer · Deliveries
- Understand the inventory overview How to: use WMS → All products (filters, Actions, product window).
- Receive incoming deliveries How to: use WMS → Deliveries and Accept & stock delivery.
- Record stock changes How to: Change stock amount on a product (Correct / Adjust).
- Move stock between warehouse locations How to: use WMS → Stock transfer.
Orders
Open / All / Back orders · Batches · Pick & Pack · Shipments · Returns
- Find and review orders How to: use Orders → Open orders, All orders and Back orders.
- Find a missing order How to: clear filters and search All orders, Shipments and Returns.
- Work with batches How to: use Orders → Batches, then Pick & Pack.
- Pick and pack an order How to: use Orders → Pick & Pack (Start picking / Start packing).
- Handle missing or damaged products during picking How to: stop a line in Pick & Pack when stock is short or damaged.
- Reprint or create an extra shipping label How to: use Orders → Shipments to reprint, or Extra shipment for a second box.
- Receive and check returns How to: use Orders → Returns and Restock / Confirm.
CRM
Sellers · Messages · Tasks · Login as user (authorised only)
Configuration
Settings → Shipping rules (read unless you are authorised to edit).
Support
In-app help and what to send your supervisor.
Was this helpful?