Lesson 4 of 19 · WMS
Understand the inventory overview
How to: use WMS → All products (filters, Actions, product window).
Use WMS → All products (page title Products) to find a seller’s item and see where it sits before you pick, receive or move stock.
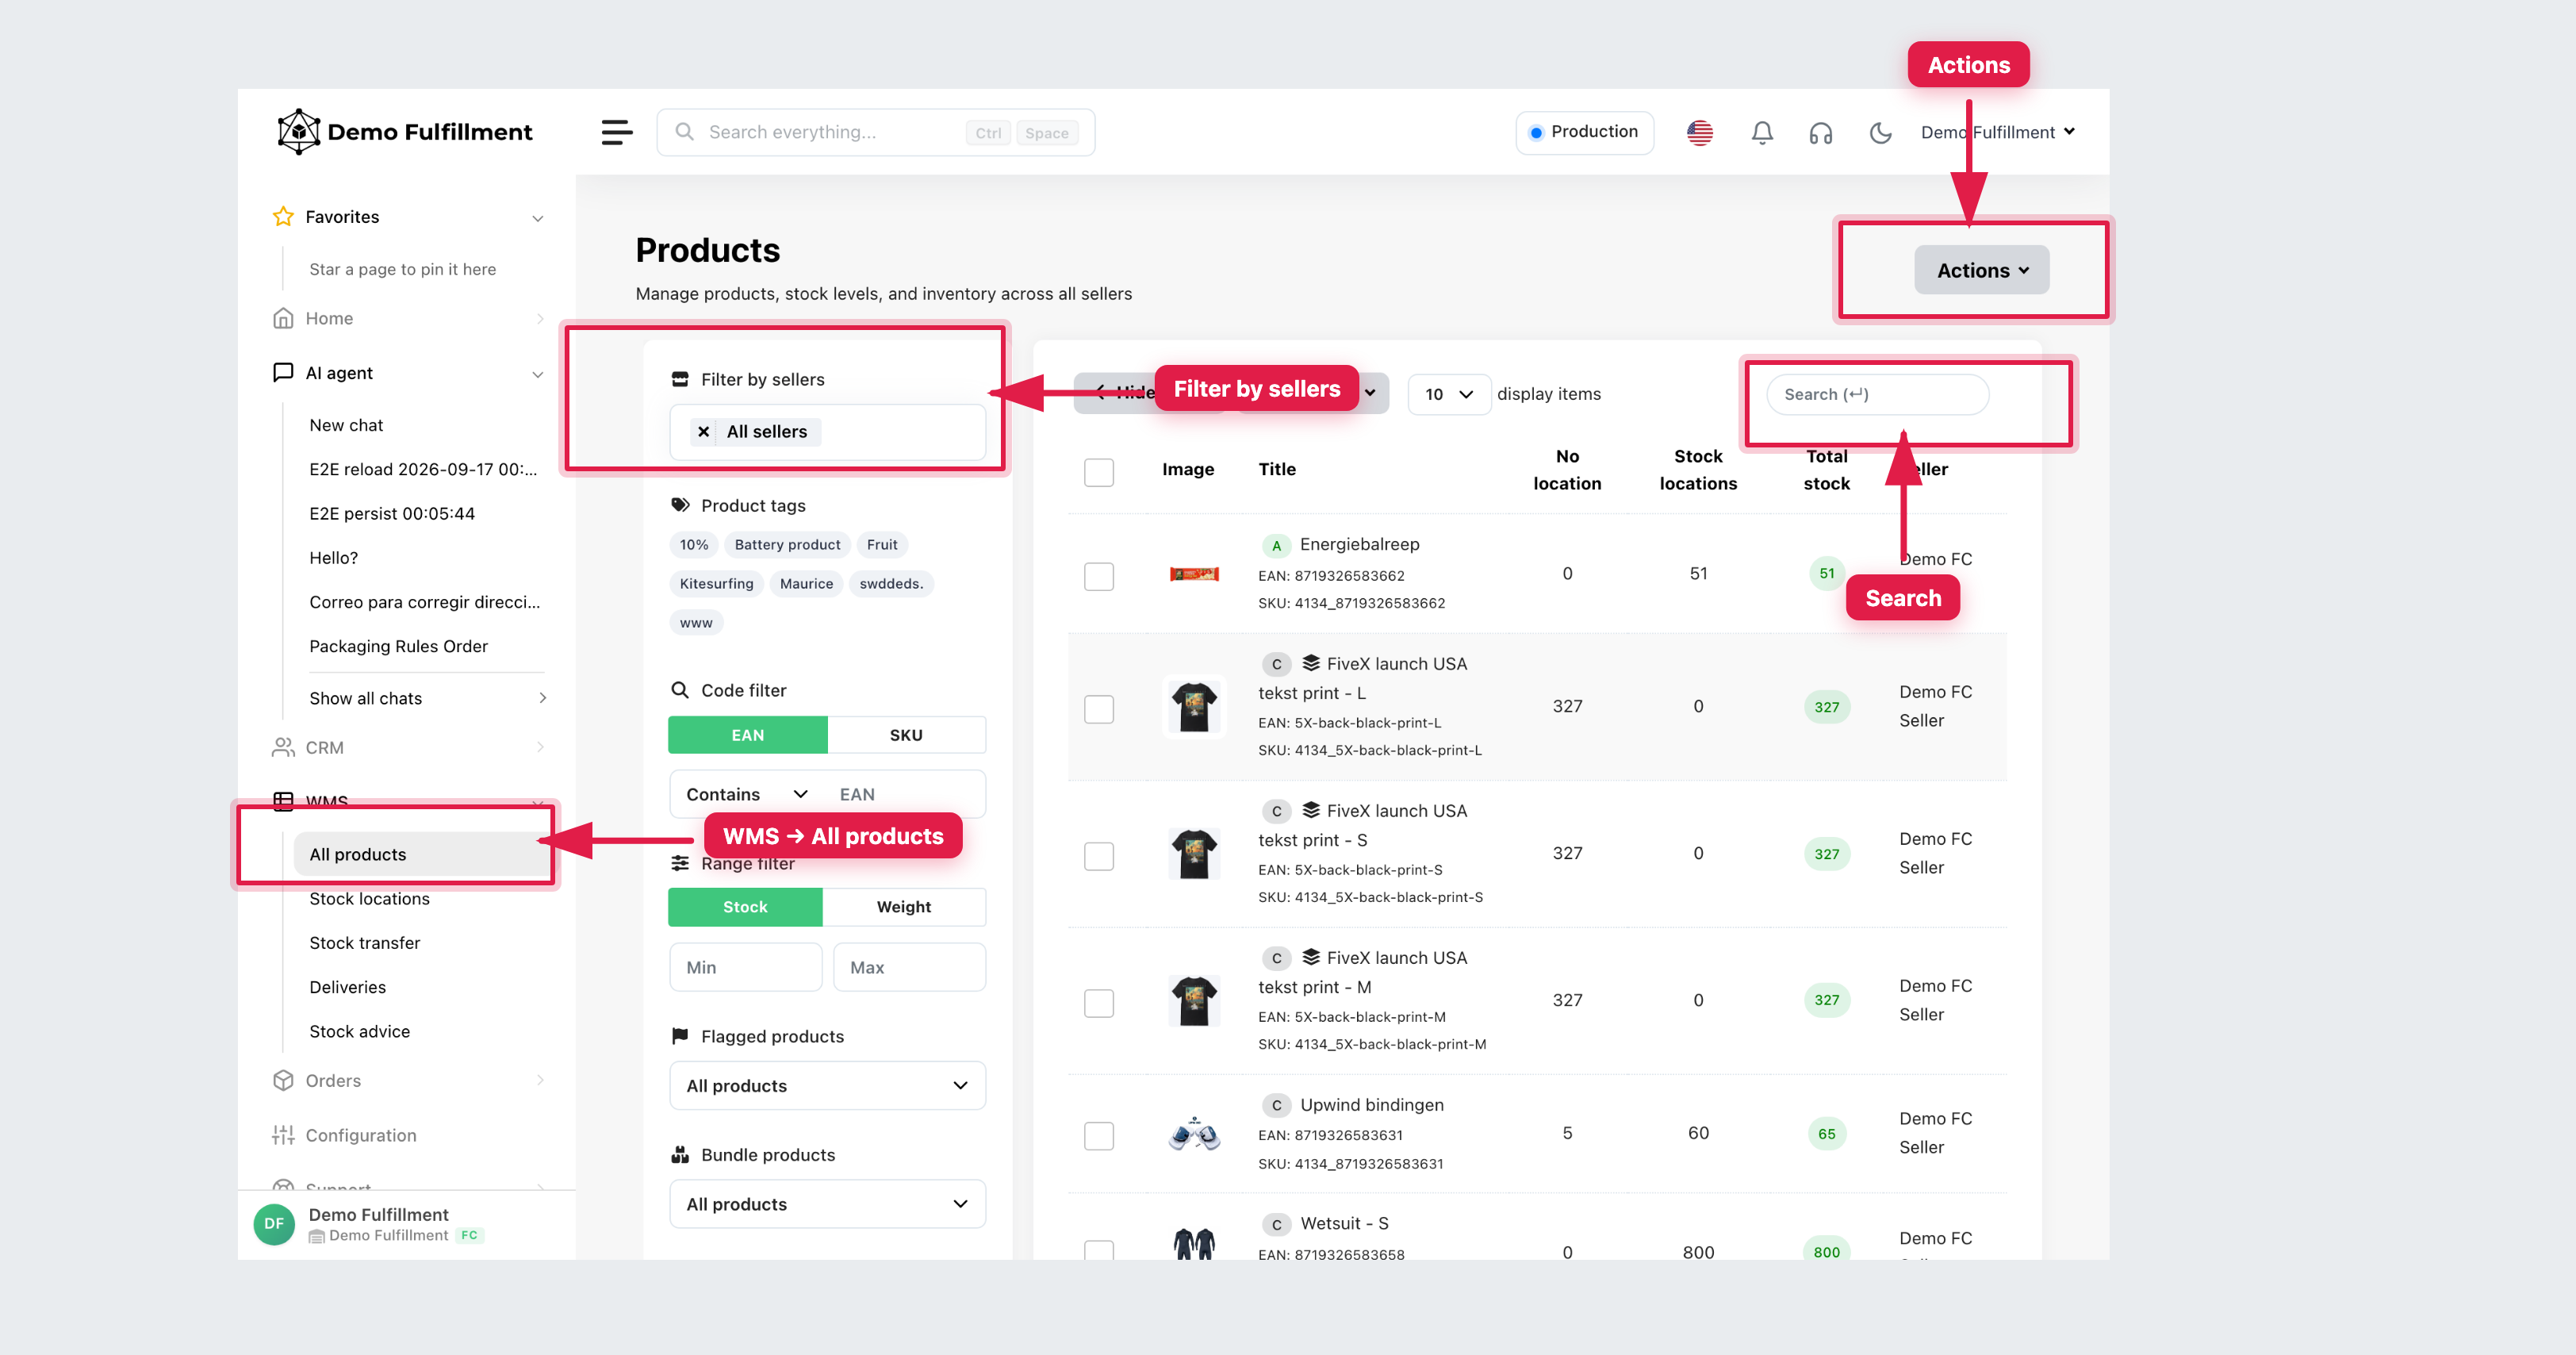
Find a product
The left panel filters the list:
- Filter by sellers — limit to one seller (do this first in a multi-seller warehouse).
- Product tags — click a tag chip to show only tagged products.
- Code filter — switch EAN or SKU, then type or scan. Contains matches part of the code.
- Range filter — Stock or Weight with min / max.
- Flagged products and Bundle products — extra list scopes.
Above the table: Hide filters, Columns (show or hide columns), how many rows to display, and Search (title, EAN or SKU). You can also use Search everything… (Ctrl + Space) at the top of the app.
Read the list
Each row shows:
- Image and Title, with EAN and SKU underneath. An A / B / C badge is the ABC classification.
- No location — stock not assigned to a bin.
- Stock locations — units on stock sections.
- Total stock — No location + Stock locations.
- Seller.
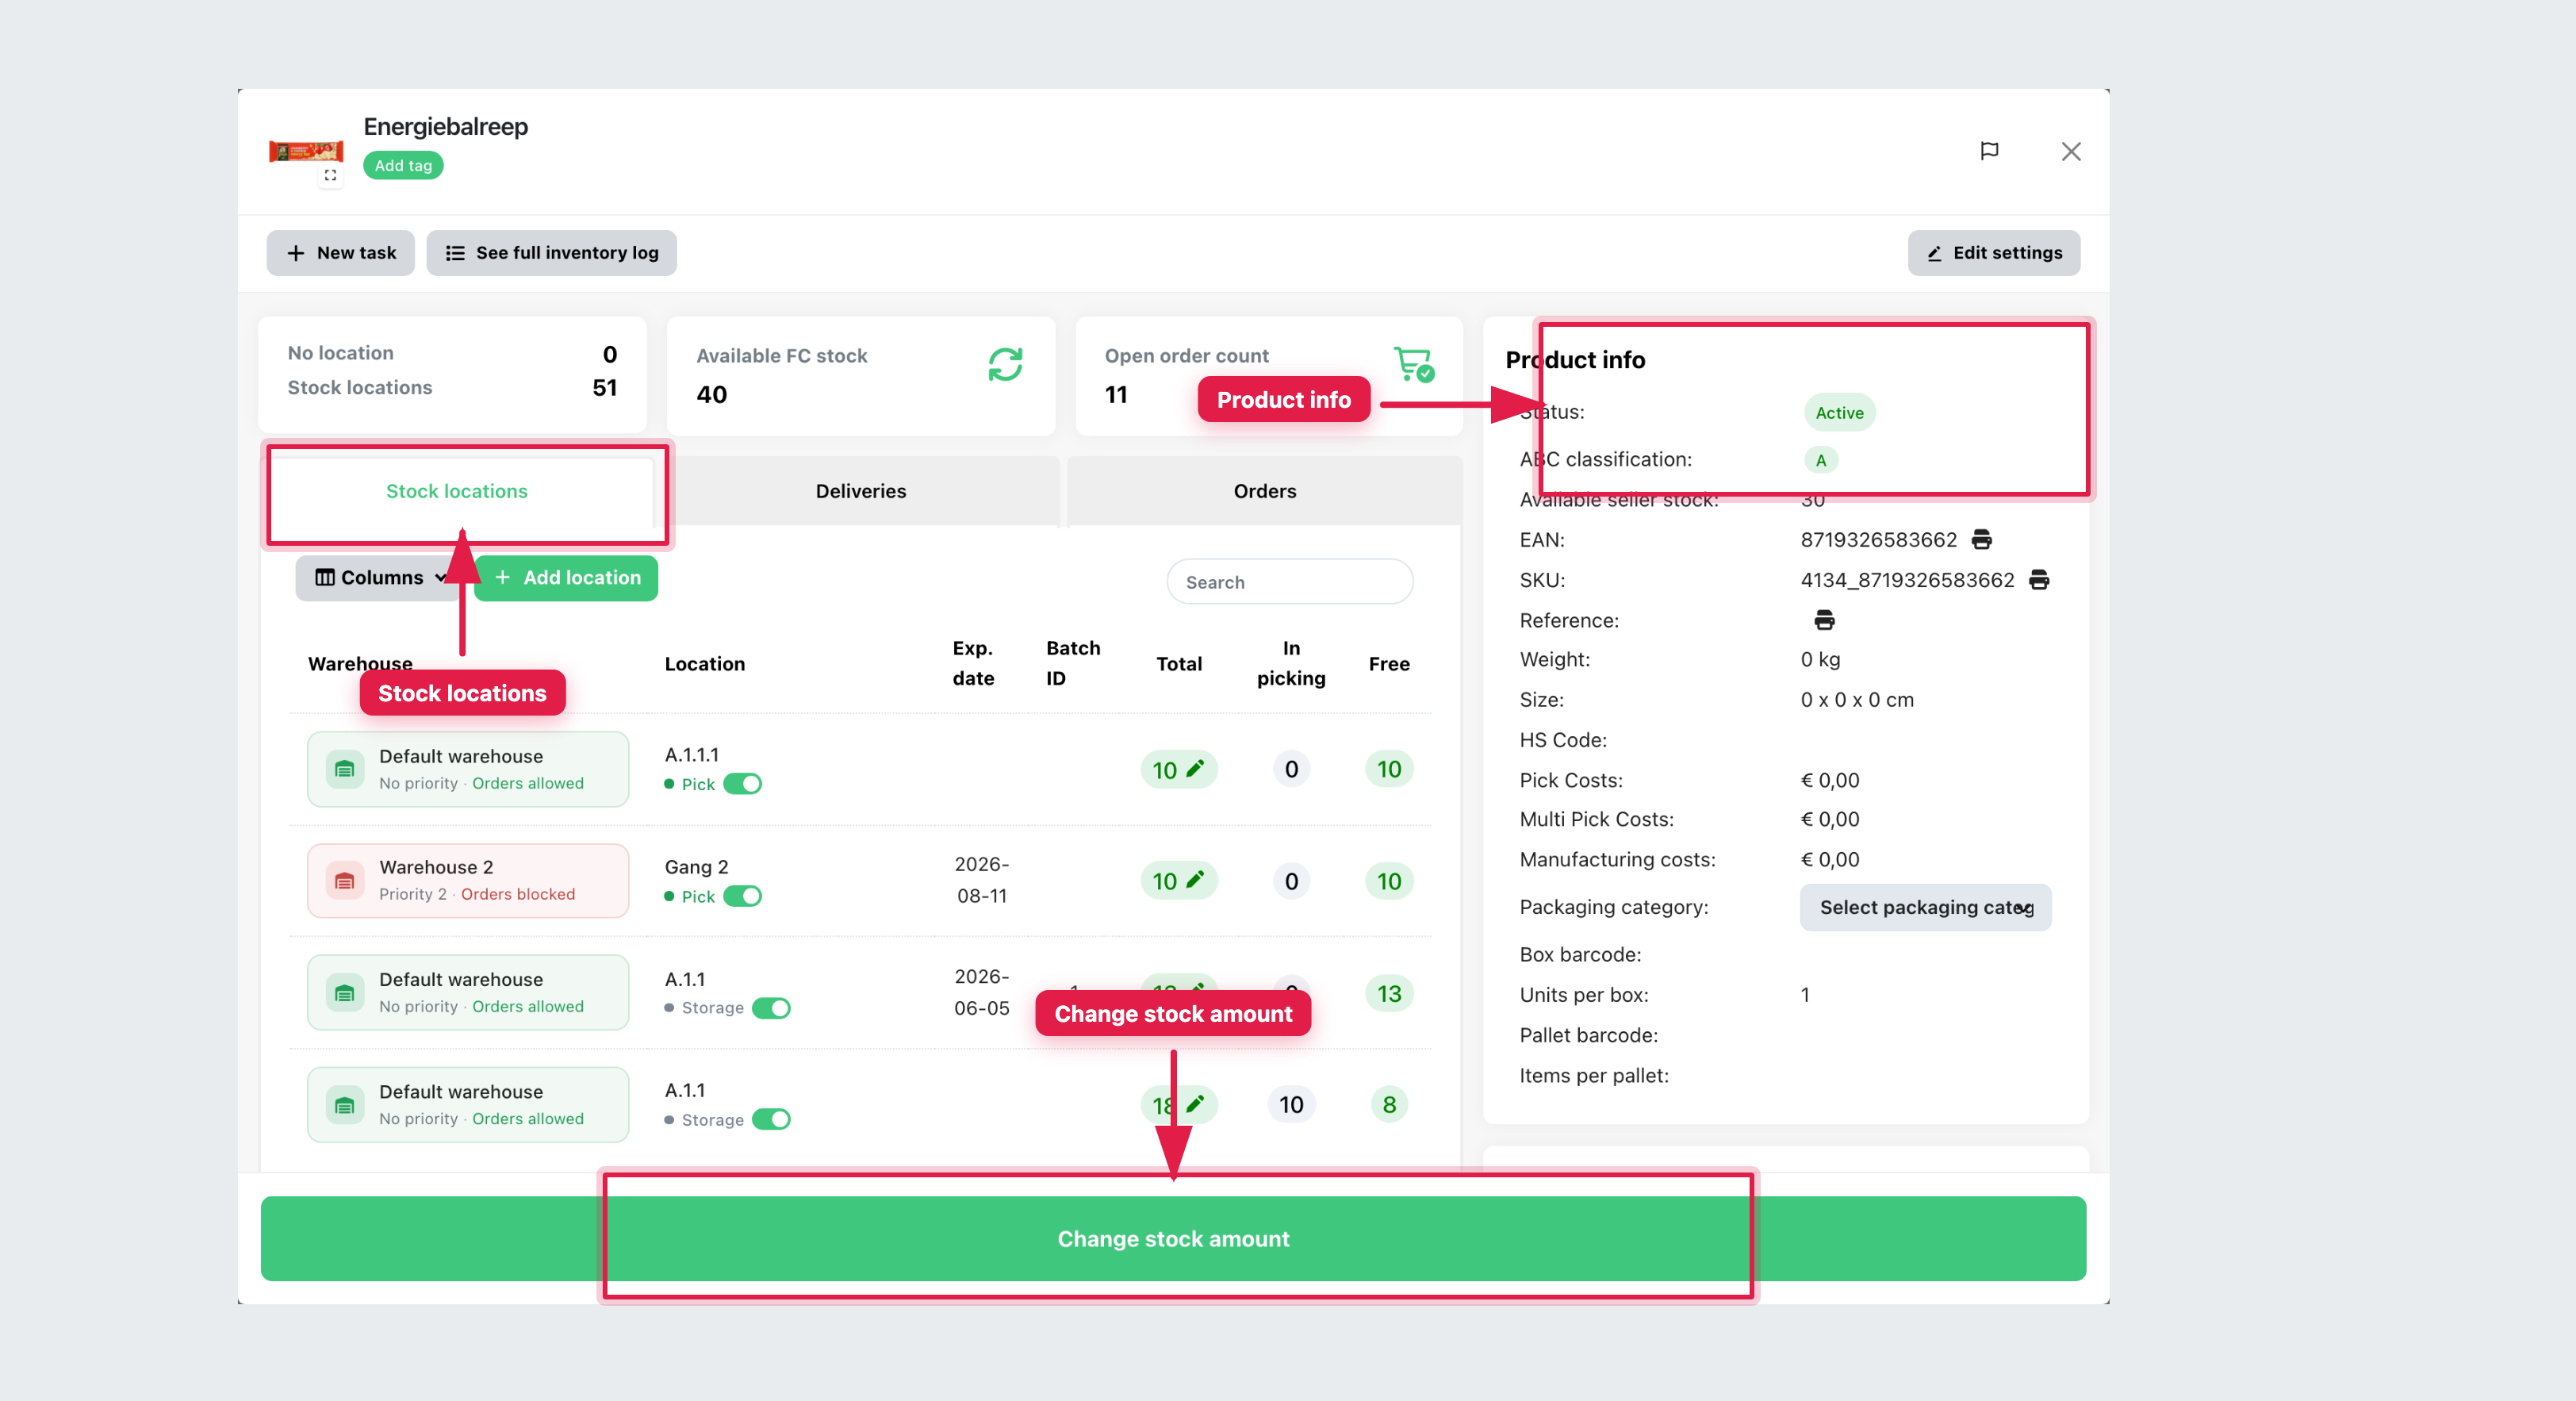
Click a row to open the product. Confirm Seller info on the right. On the product window, read Available FC stock, Open order count, and the Stock locations table: warehouse, location type (Pick / Storage), Total, In picking, and Free. Use Change stock amount only when you are correcting a count.
If the shelf does not match the screen, go to Record stock changes. Do not guess.
Page Actions (top right)
The Actions button at the top right of Products is for list-wide work (not one selected row):
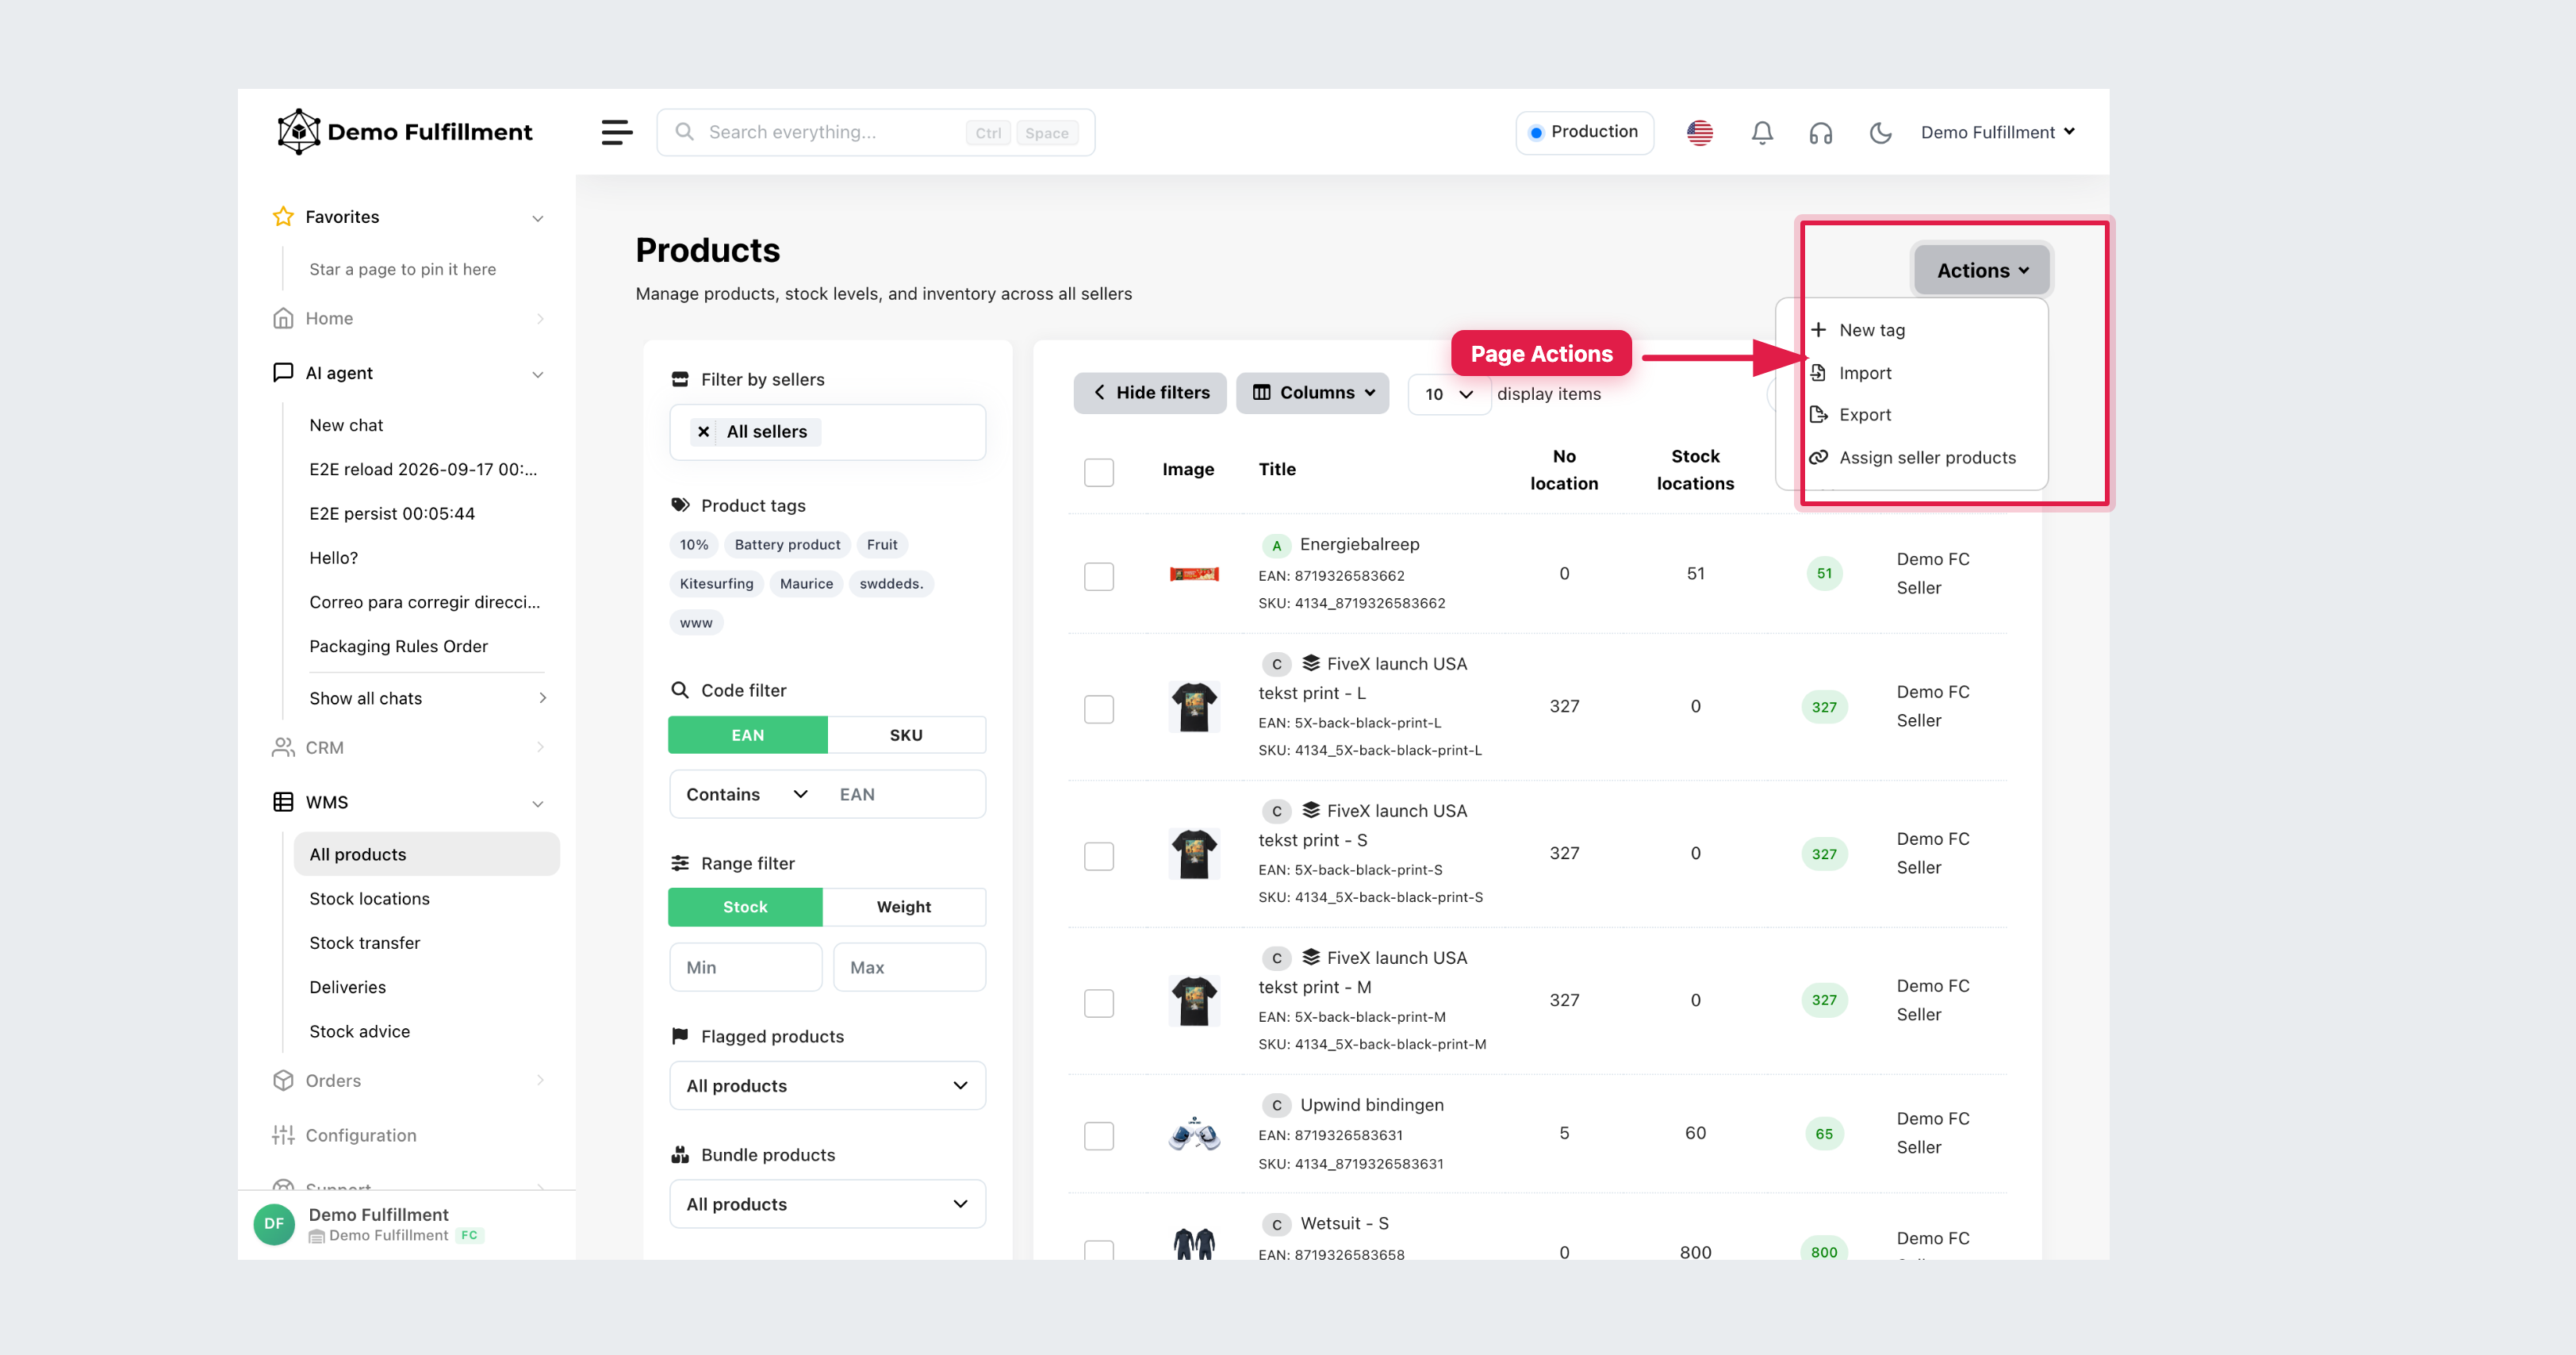
- New tag — create a product tag.
- Import / Export — spreadsheet update of many products (usually a supervisor).
- Assign seller products — link products to a seller.
Select products: a second Actions menu appears
Tick the checkboxes on one or more rows. A green Actions button appears next to Columns, with a count of how many products you selected (for example Actions 3).
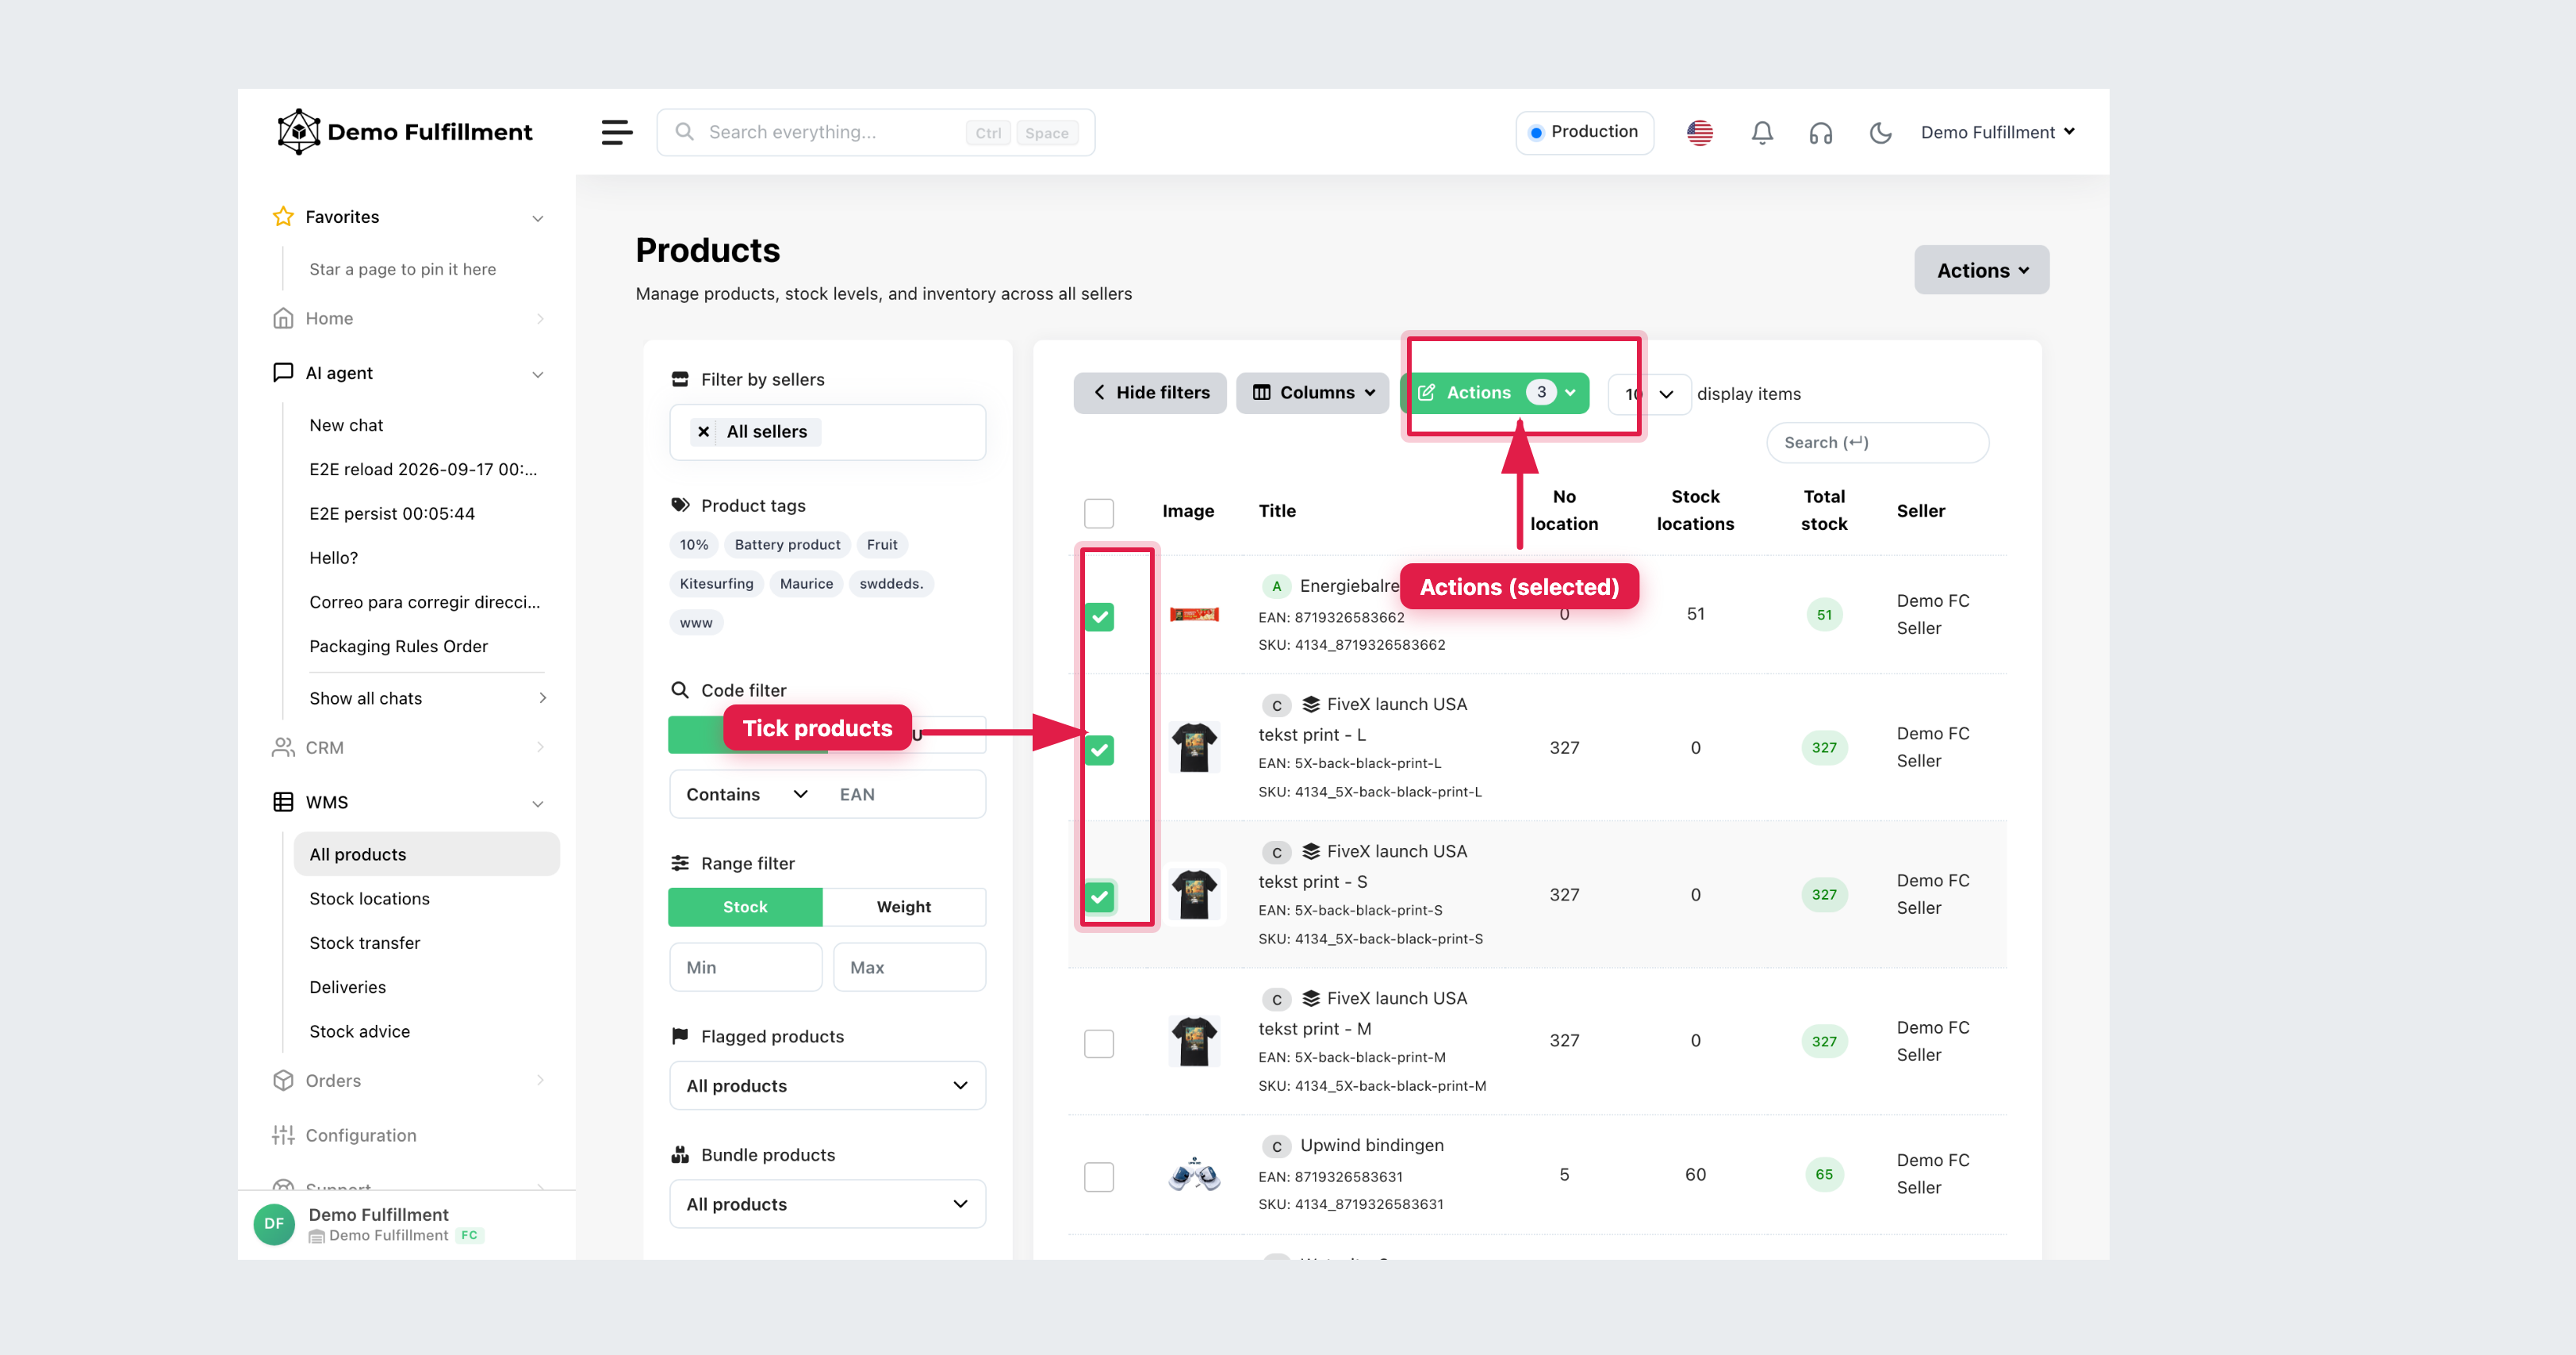
Open that Actions menu to work on only the selected products:
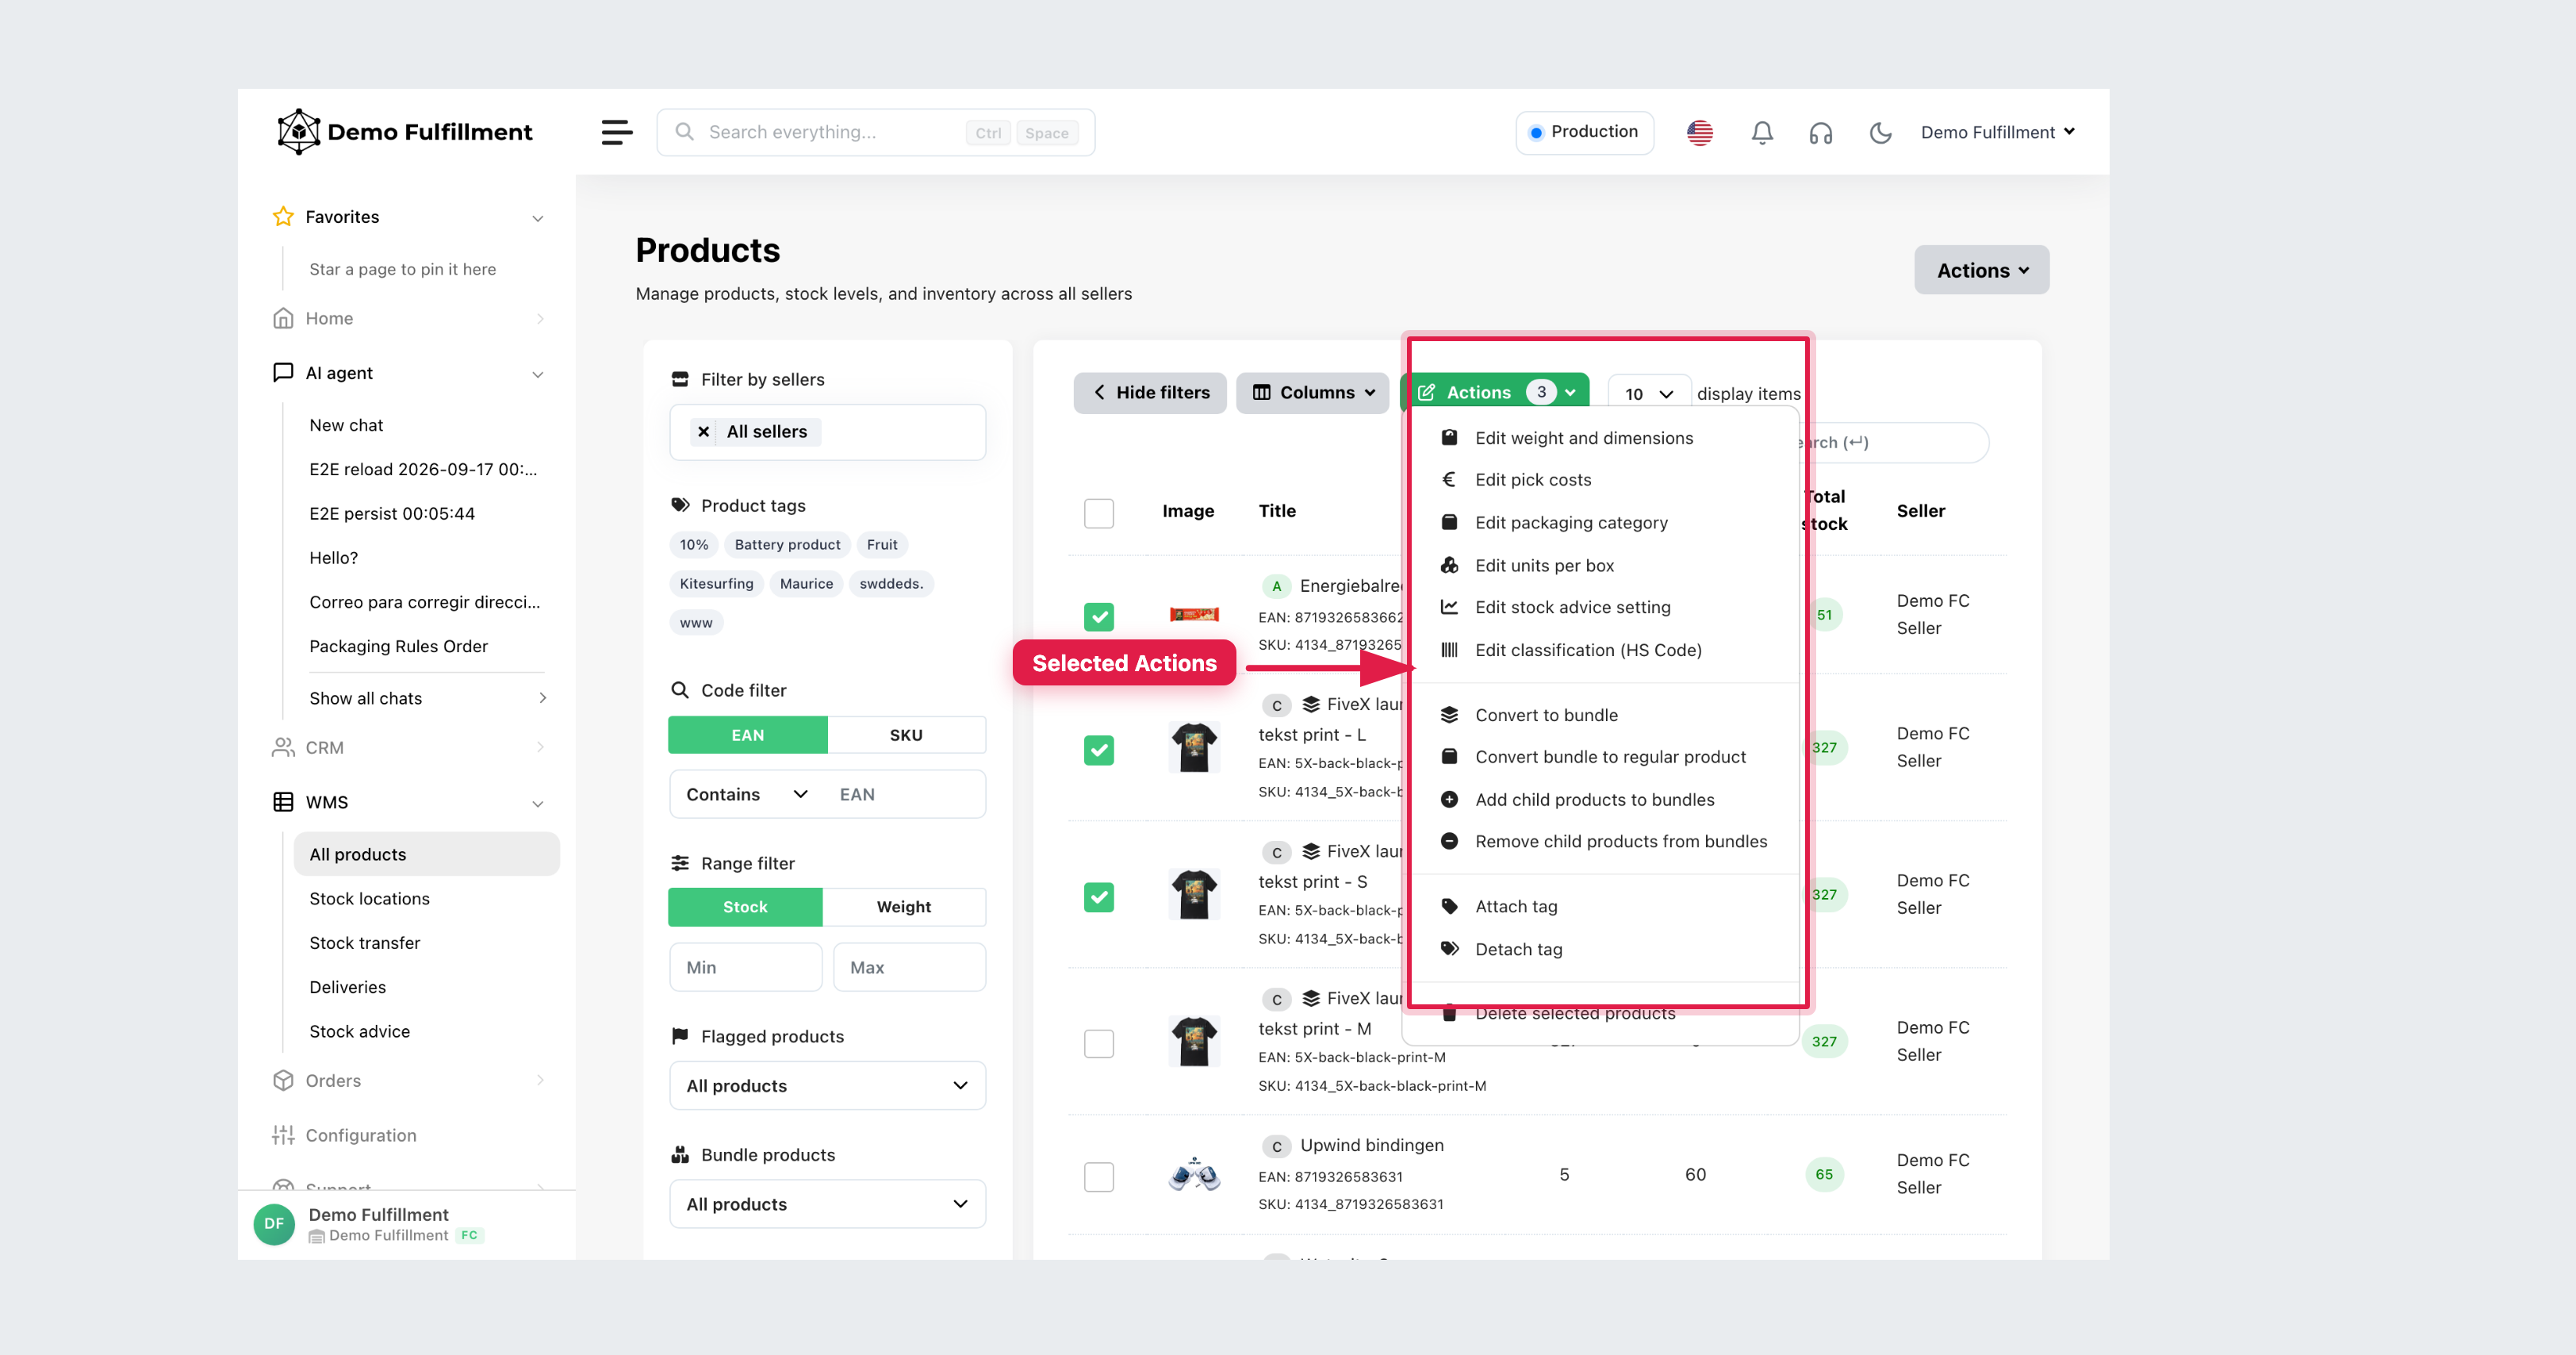
- Edit weight and dimensions, Edit pick costs, Edit packaging category, Edit units per box, Edit stock advice setting, Edit classification (HS Code)
- Convert to bundle / Convert bundle to regular product
- Add child products to bundles / Remove child products from bundles
- Attach tag / Detach tag
- Delete selected products
Use these only if your role allows it. Floor work is usually find + read stock. Do not delete products or change pick costs unless a supervisor asks.
Stock locations map
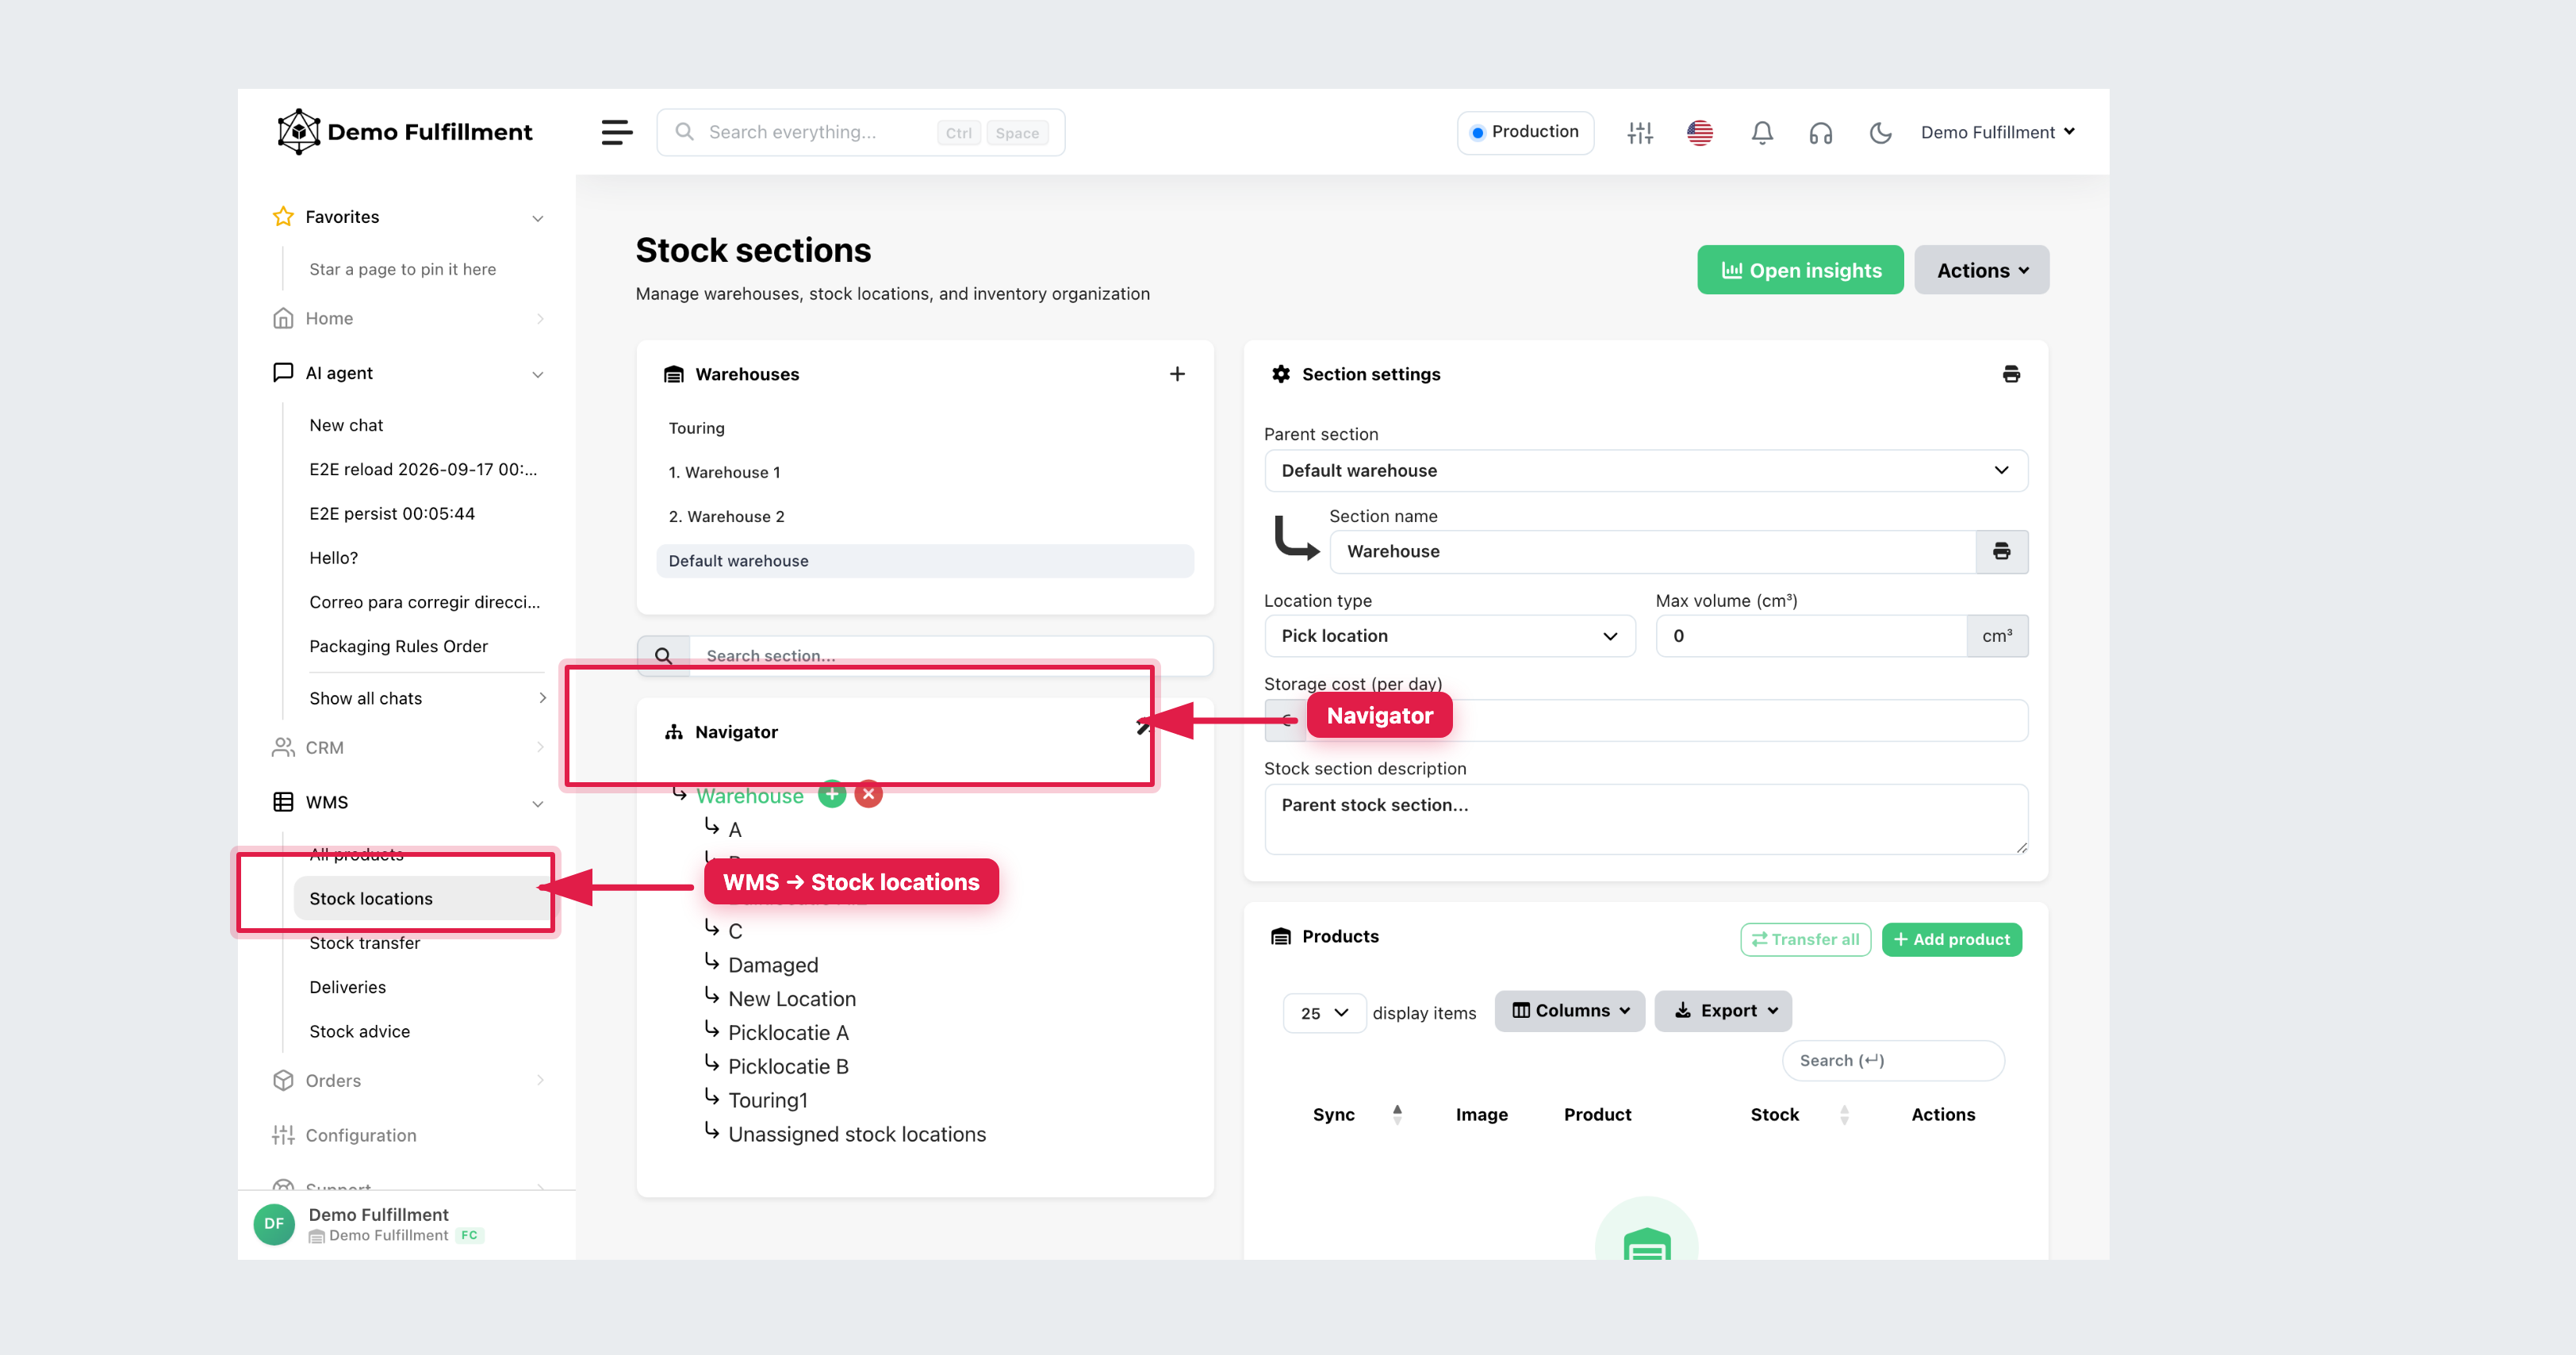
To see the warehouse tree, go to WMS → Stock locations (page title Stock sections). Pick a warehouse and a section in the navigator, then read the products in that bin. Transfer all on a section is a move, not a stock correction.
More help: Editing products
Was this helpful?