Lesson 5 of 19 · WMS
Receive incoming deliveries
How to: use WMS → Deliveries and Accept & stock delivery.
Inbound goods live in WMS → Deliveries. ChannelDock only adds stock after you click Accept & stock delivery. Until then the delivery can be Confirmed by seller but the warehouse count has not changed.
Do not stock a delivery if the pallet is not physically here.
1. Open the deliveries list
Go to WMS → Deliveries.
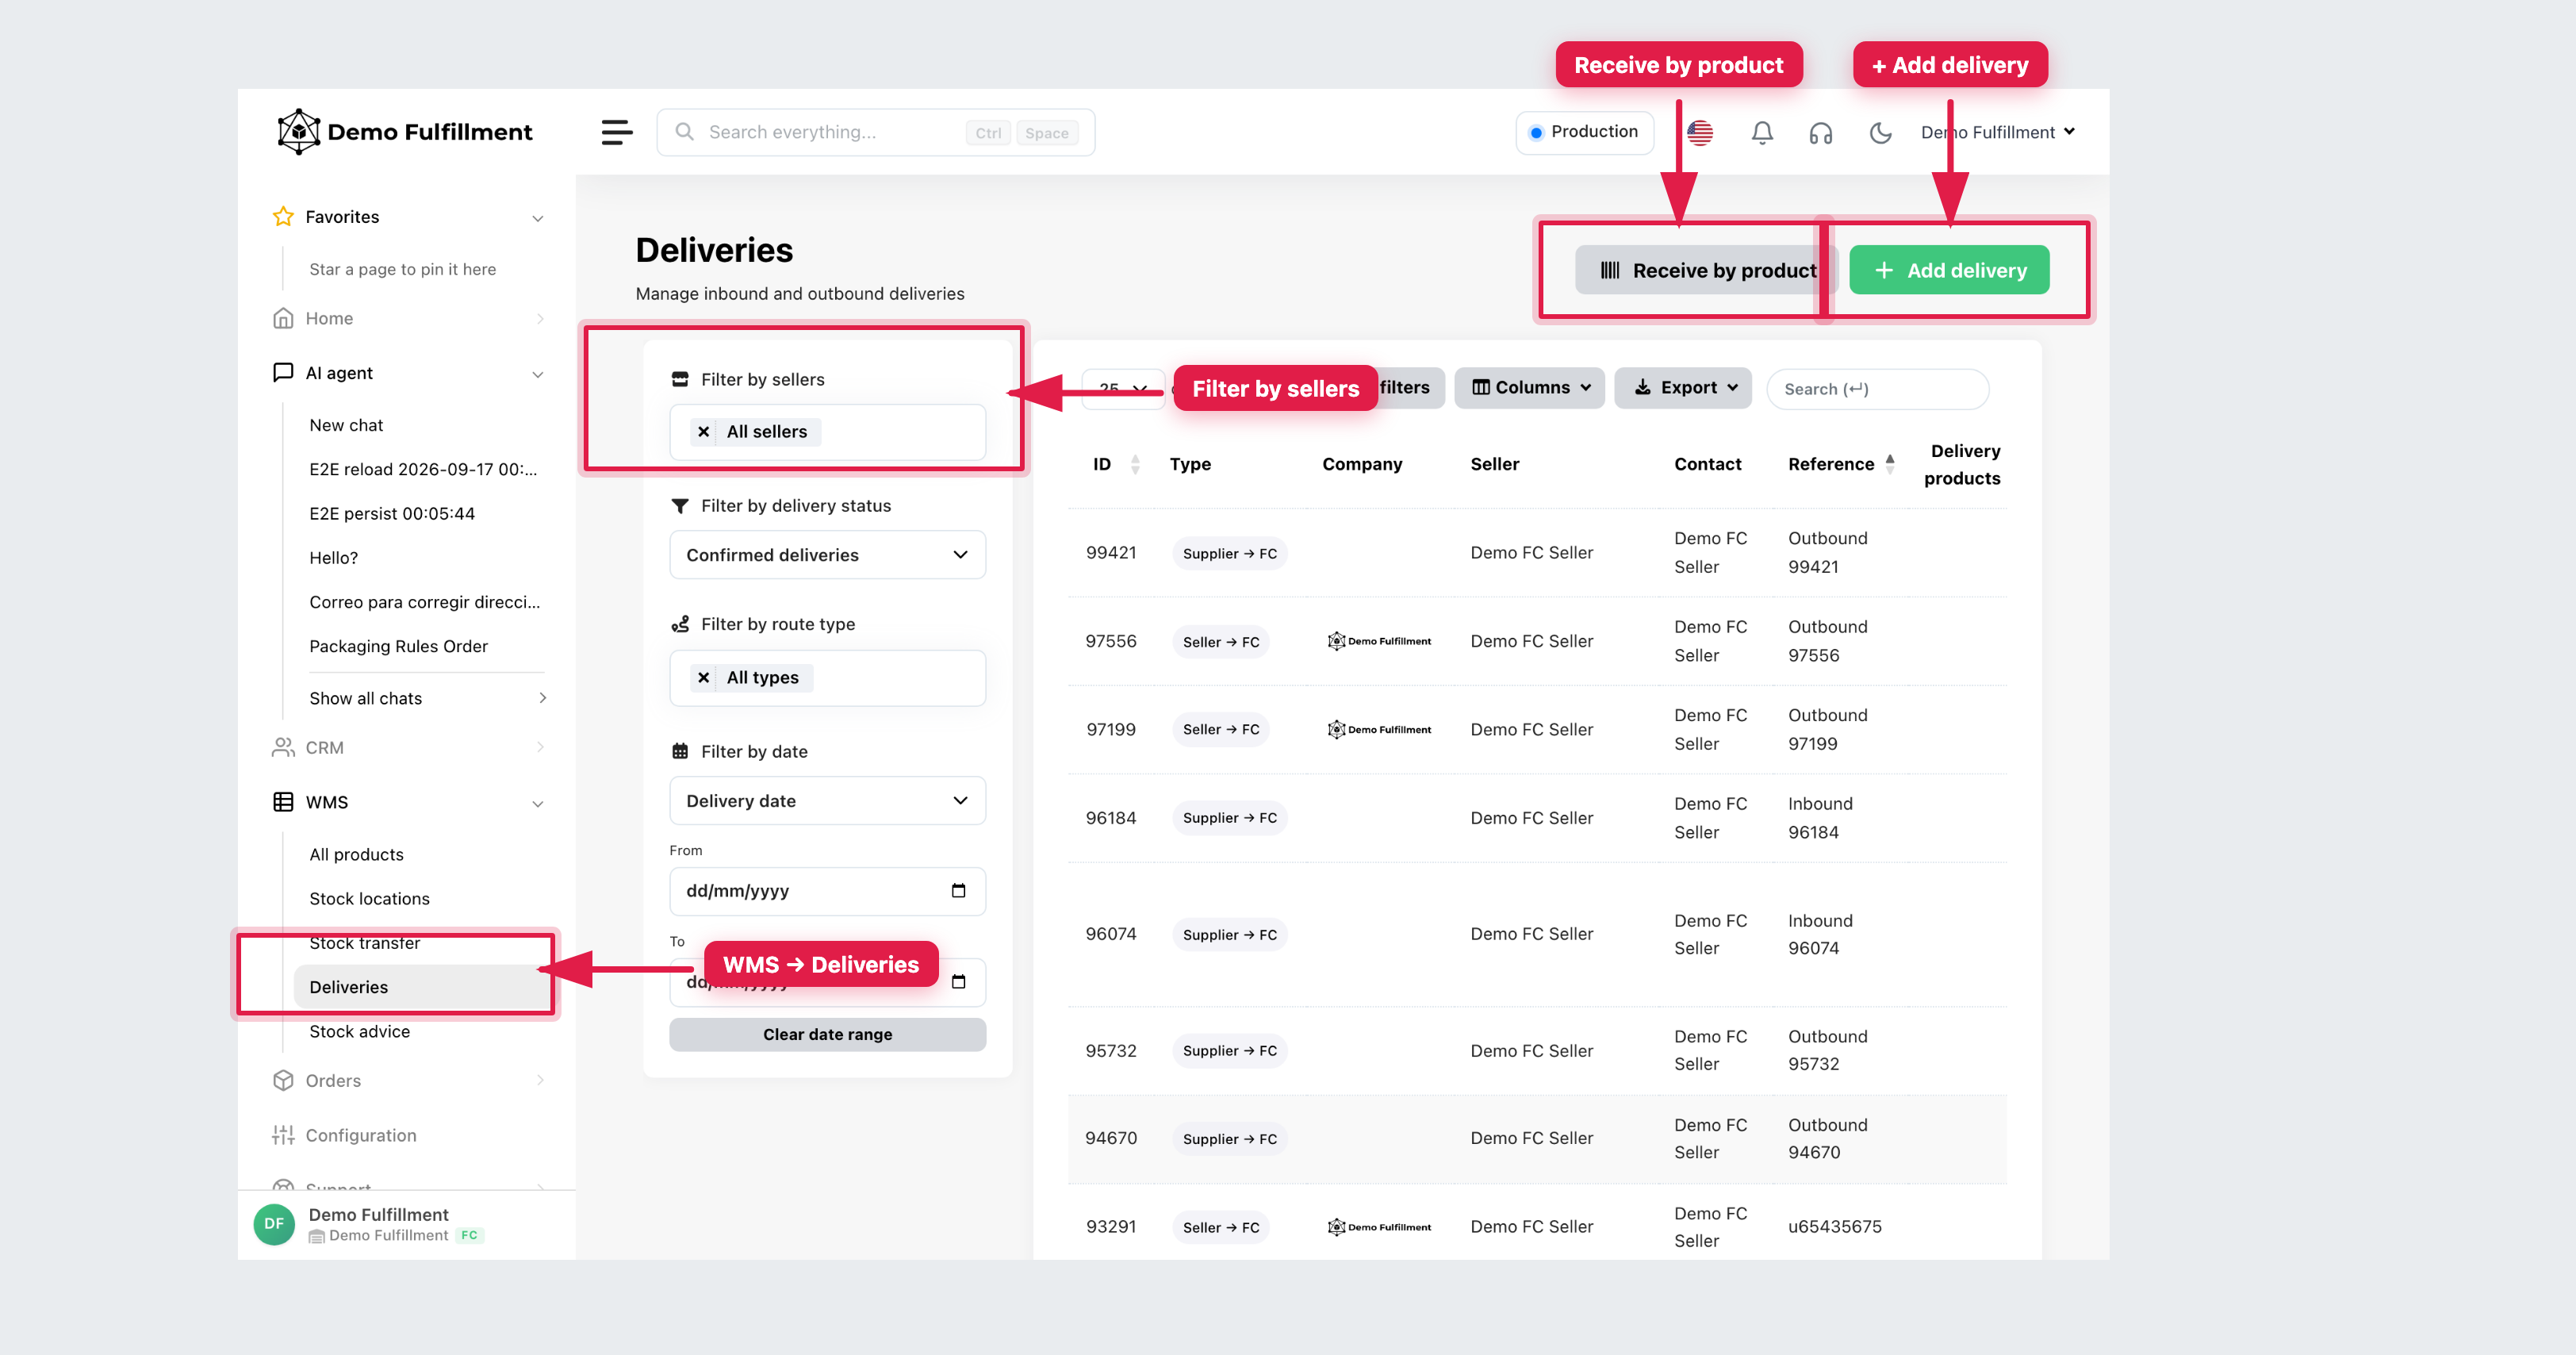
On the left, set:
- Filter by sellers — the seller whose goods arrived
- Filter by delivery status — use Confirmed deliveries for work that is expected
- Filter by route type if you need to hide outbound shipments
On the table, Type is the route (Supplier → FC or Seller → FC). Open only a row that is coming to your warehouse. The delivery window also shows Inbound or Outbound in the top right.
+ Add delivery creates a new delivery (usually a supervisor). Receive by product is a scan-by-EAN/SKU shortcut if your warehouse uses it instead of opening a delivery first.
2. Open the inbound delivery
Click the row. Check the header:
- Delivery number (for example
#96184) - Inbound
- Seller company
- Reference
- Status (often Confirmed by seller before you receive)
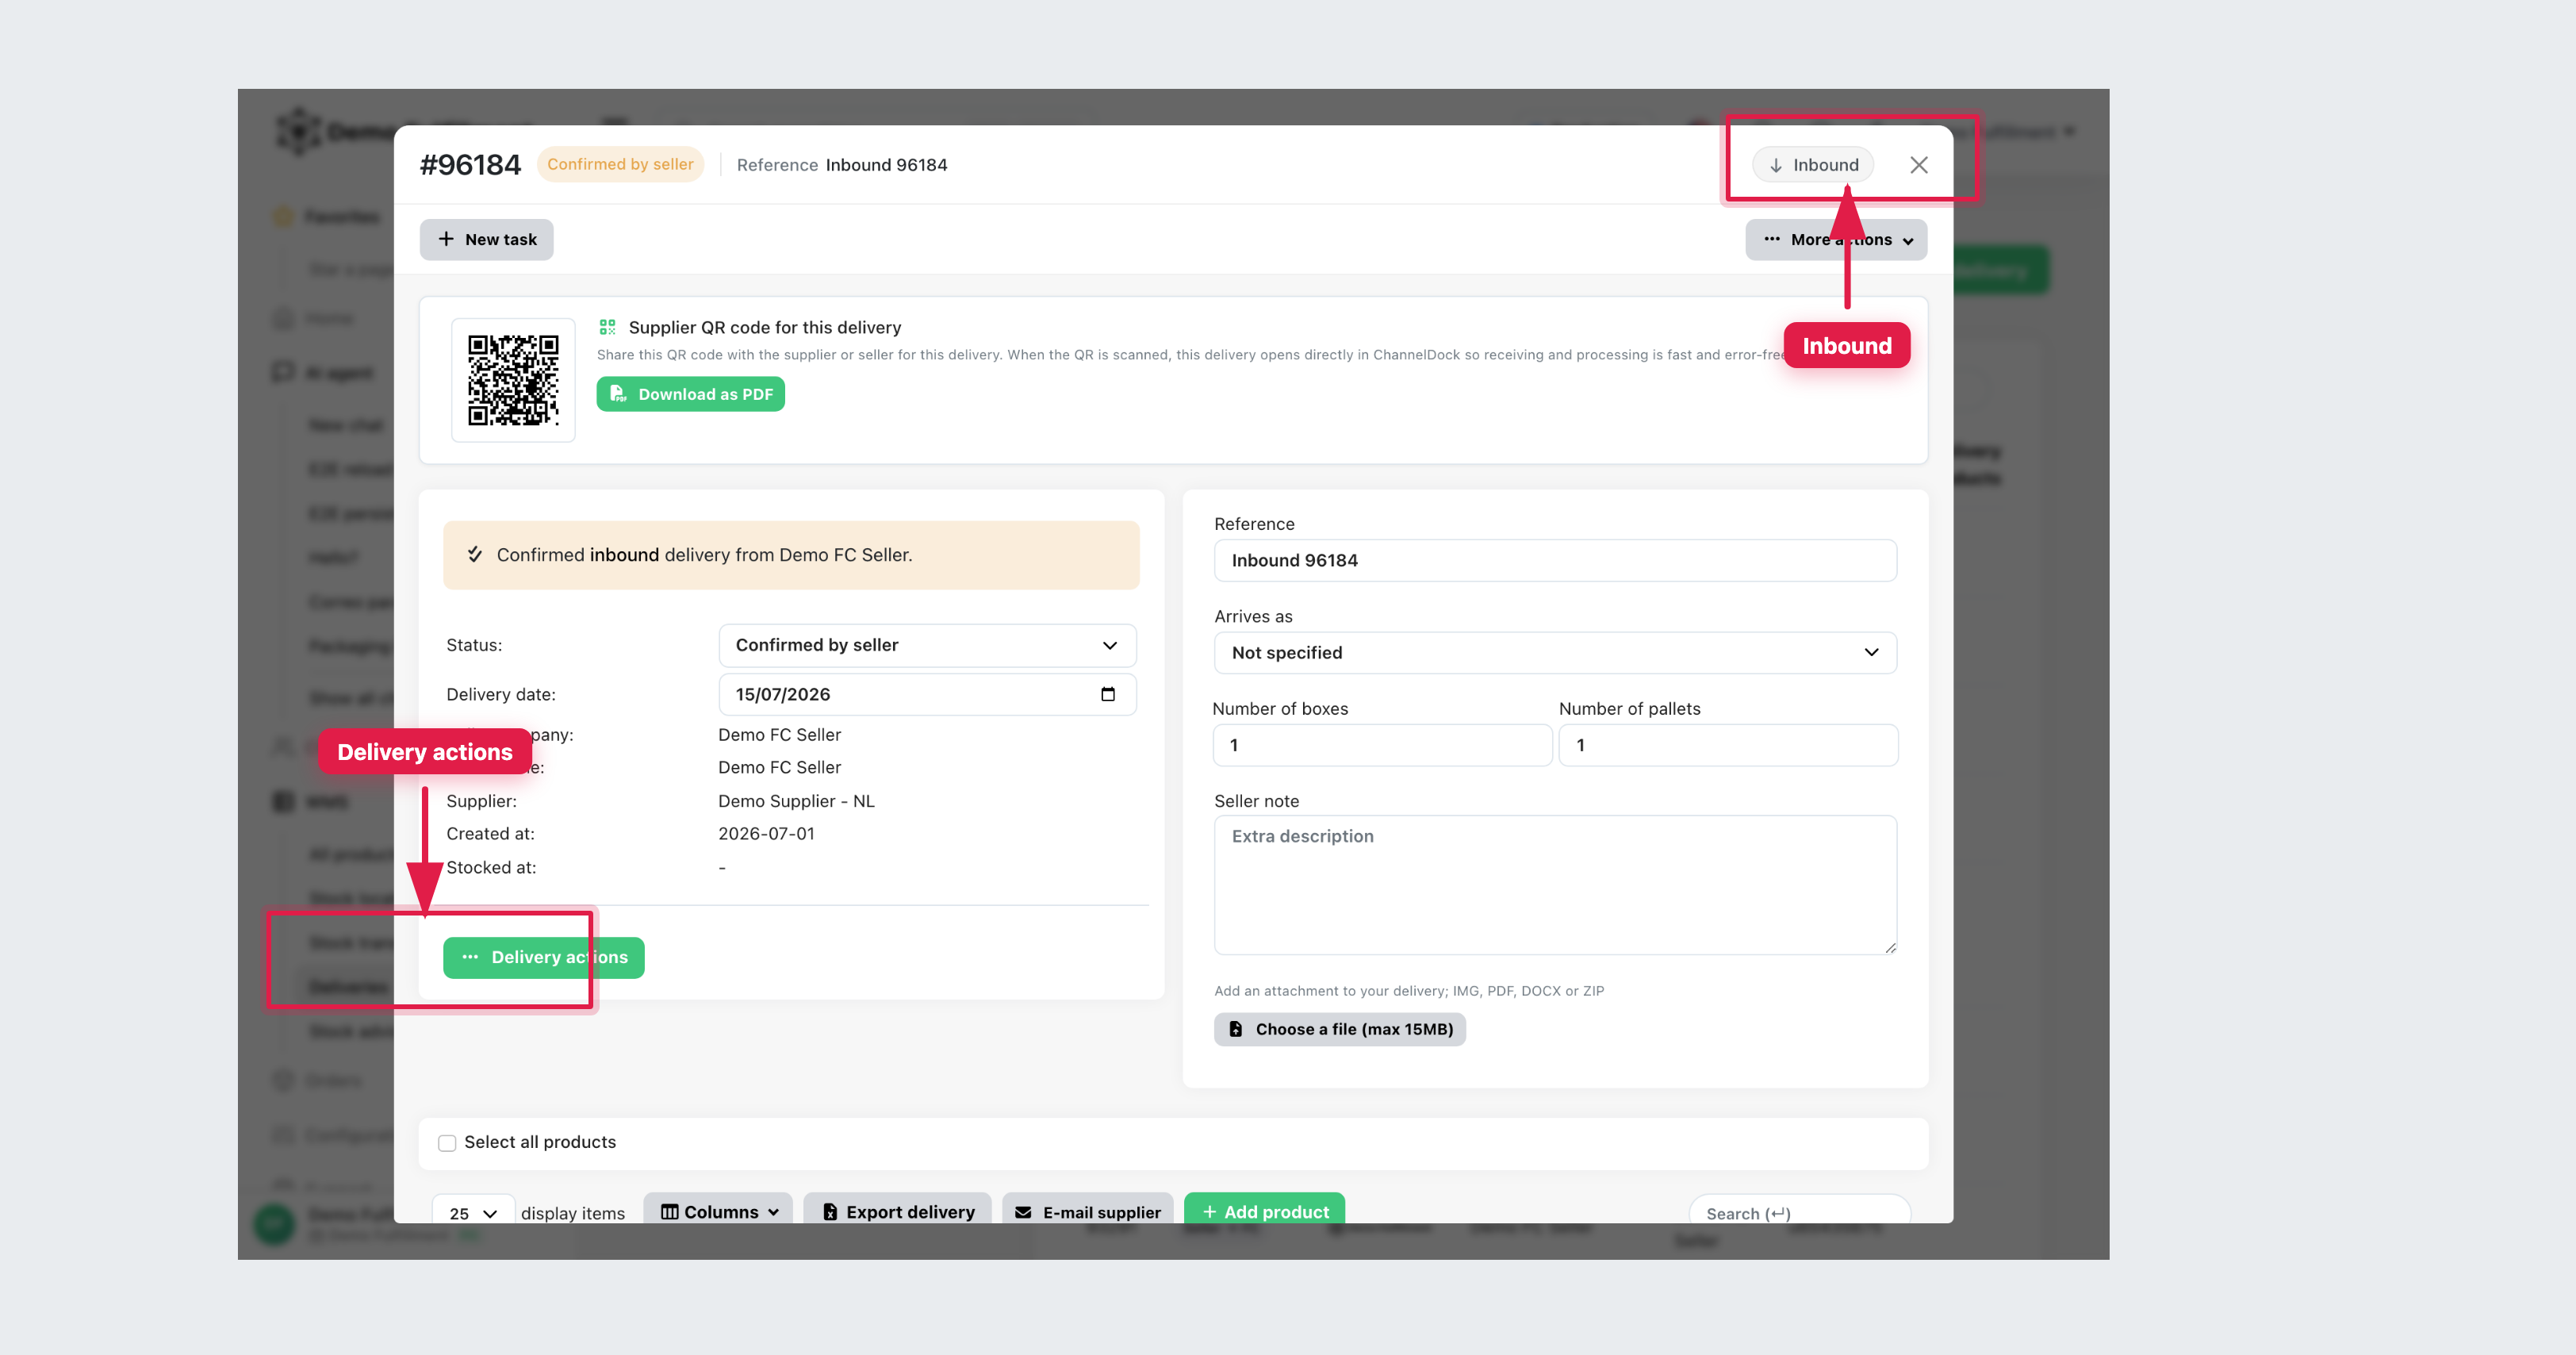
If this is outbound, or the wrong seller, close it and open another row.
3. Count the lines
Scroll to the product list.
- Compare each line to what is on the floor (title, EAN/SKU, quantity).
- Use + / − so the received amount matches what you actually have.
- Assign a stock location on the line if your warehouse uses locations.
- Fill Serial / Exp. date / Batch when the product requires it.
Report extras, shortages or damage to your supervisor before you stock. Do not invent a different SKU.
4. Put the goods away, then stock
Put the units on the location you entered.
Then click Delivery actions (green button on the left) and choose Accept & stock delivery. That receives the goods into stock and completes the locations.
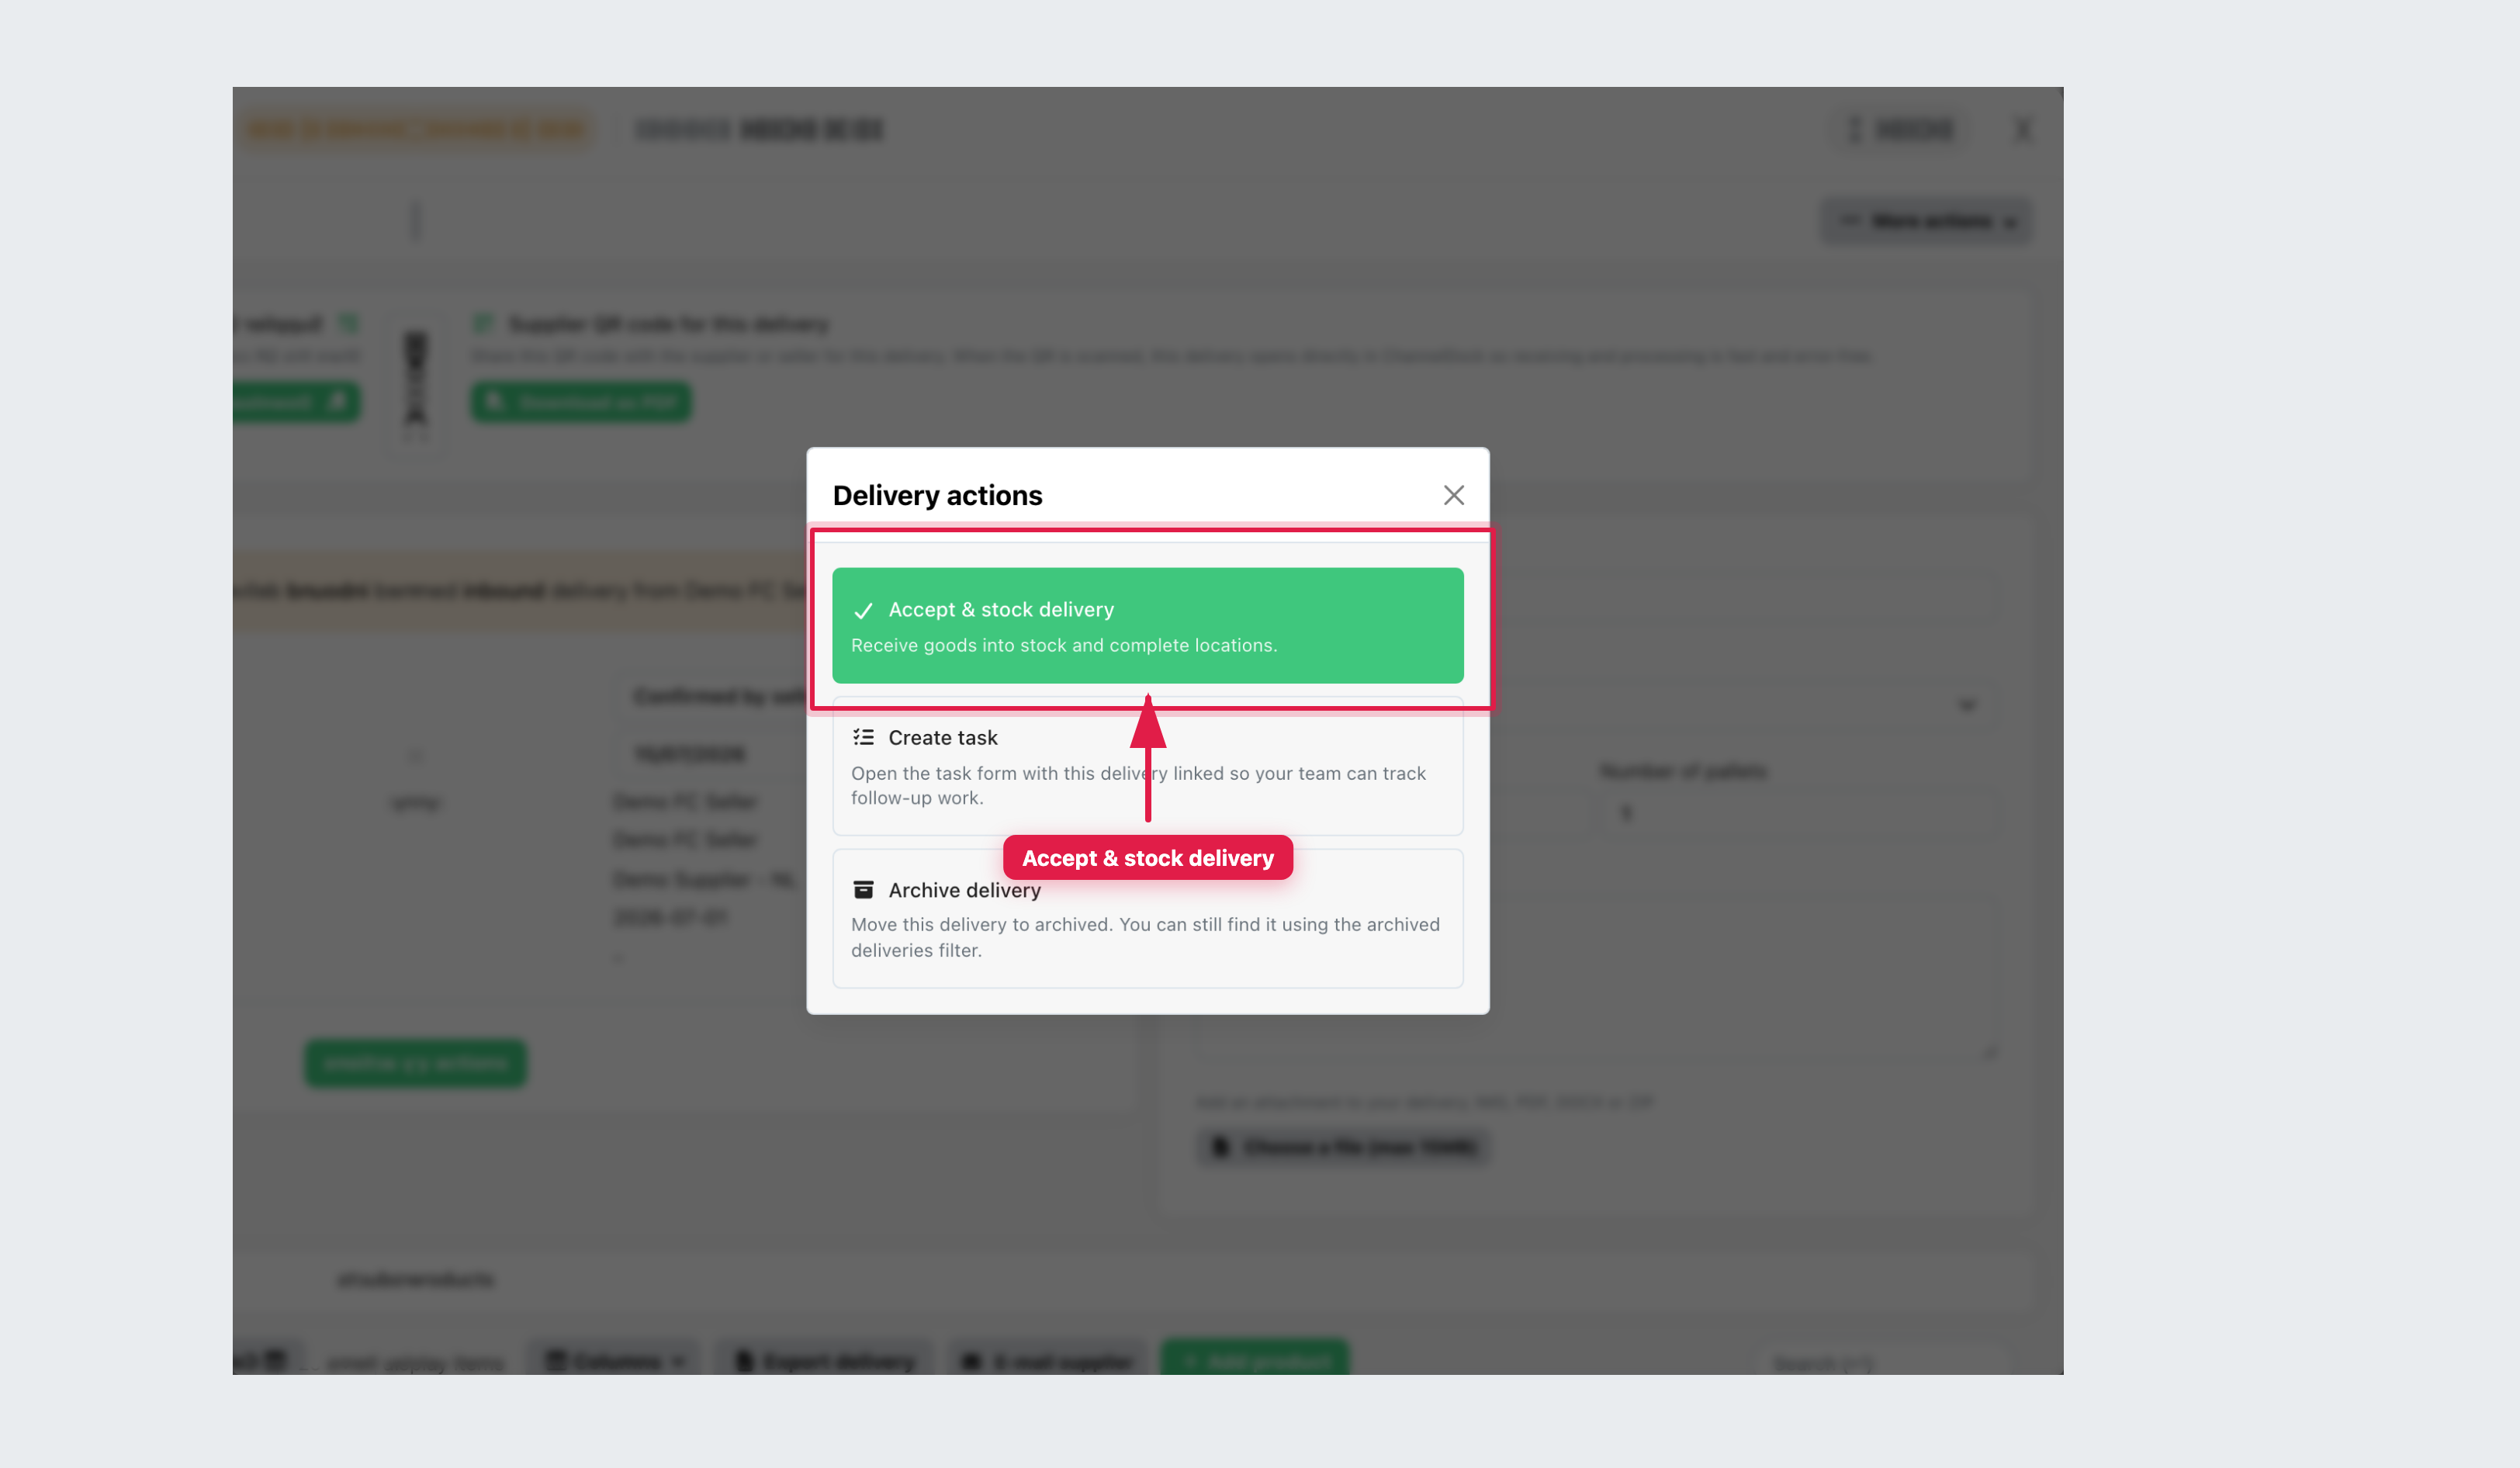
Status on the delivery then moves to Stocked. The other statuses in the dropdown are the timeline: New → Confirmed by seller → Shipped → Delivered → Stocked. You do not walk those by hand for a normal inbound receive.
Other buttons on this delivery
- Tick one or more product lines, then Accept selected (stock) — stock only those lines (partial receive).
- Assign location — set a location on the selected lines.
- Set amount to ordered quantity — fill received qty from the expected qty. Only use this after you counted.
- More actions — export, email supplier, and other admin items. Skip unless asked.
- Delivery actions can also Create task, Archive delivery, or (on some outbound deliveries) create a B2B order.
More help: Manage inbound/outbound deliveries
Was this helpful?