Adding API connections to ChannelDock Fulfillment
Last updated
Fulfillment-center API connections live under Configuration → Settings. Open that page, then choose Carriers, Printers, or Integrations.
Direct links:
Shipping carriers
Use this when you want ChannelDock to create shipping labels (Sendcloud, MyParcel, DHL, and others).
-
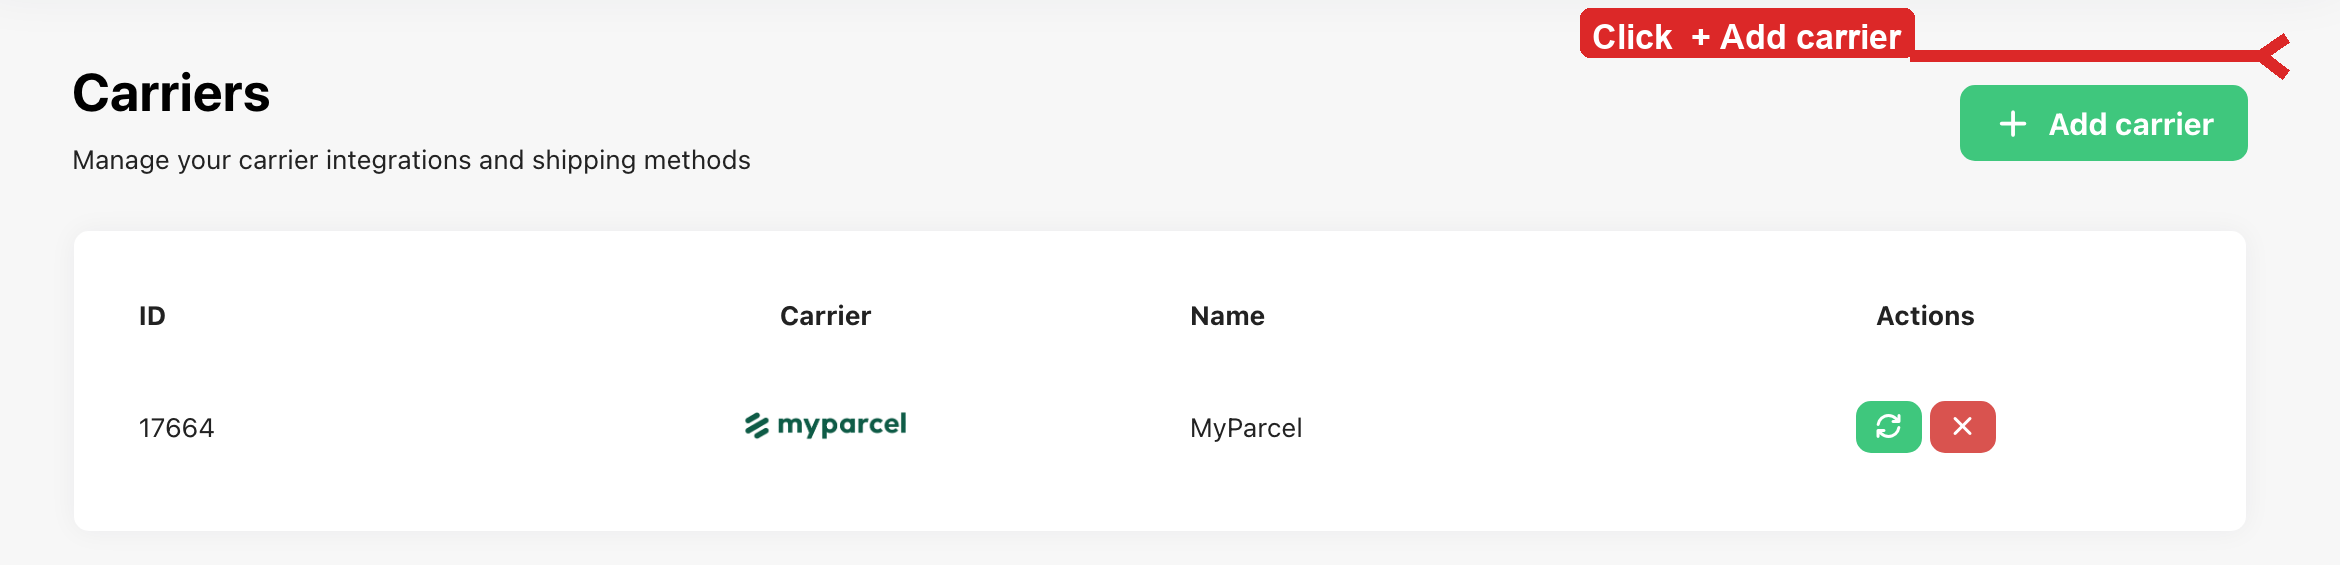
Go to Configuration → Settings → Carriers.
-
Click + Add carrier.
-
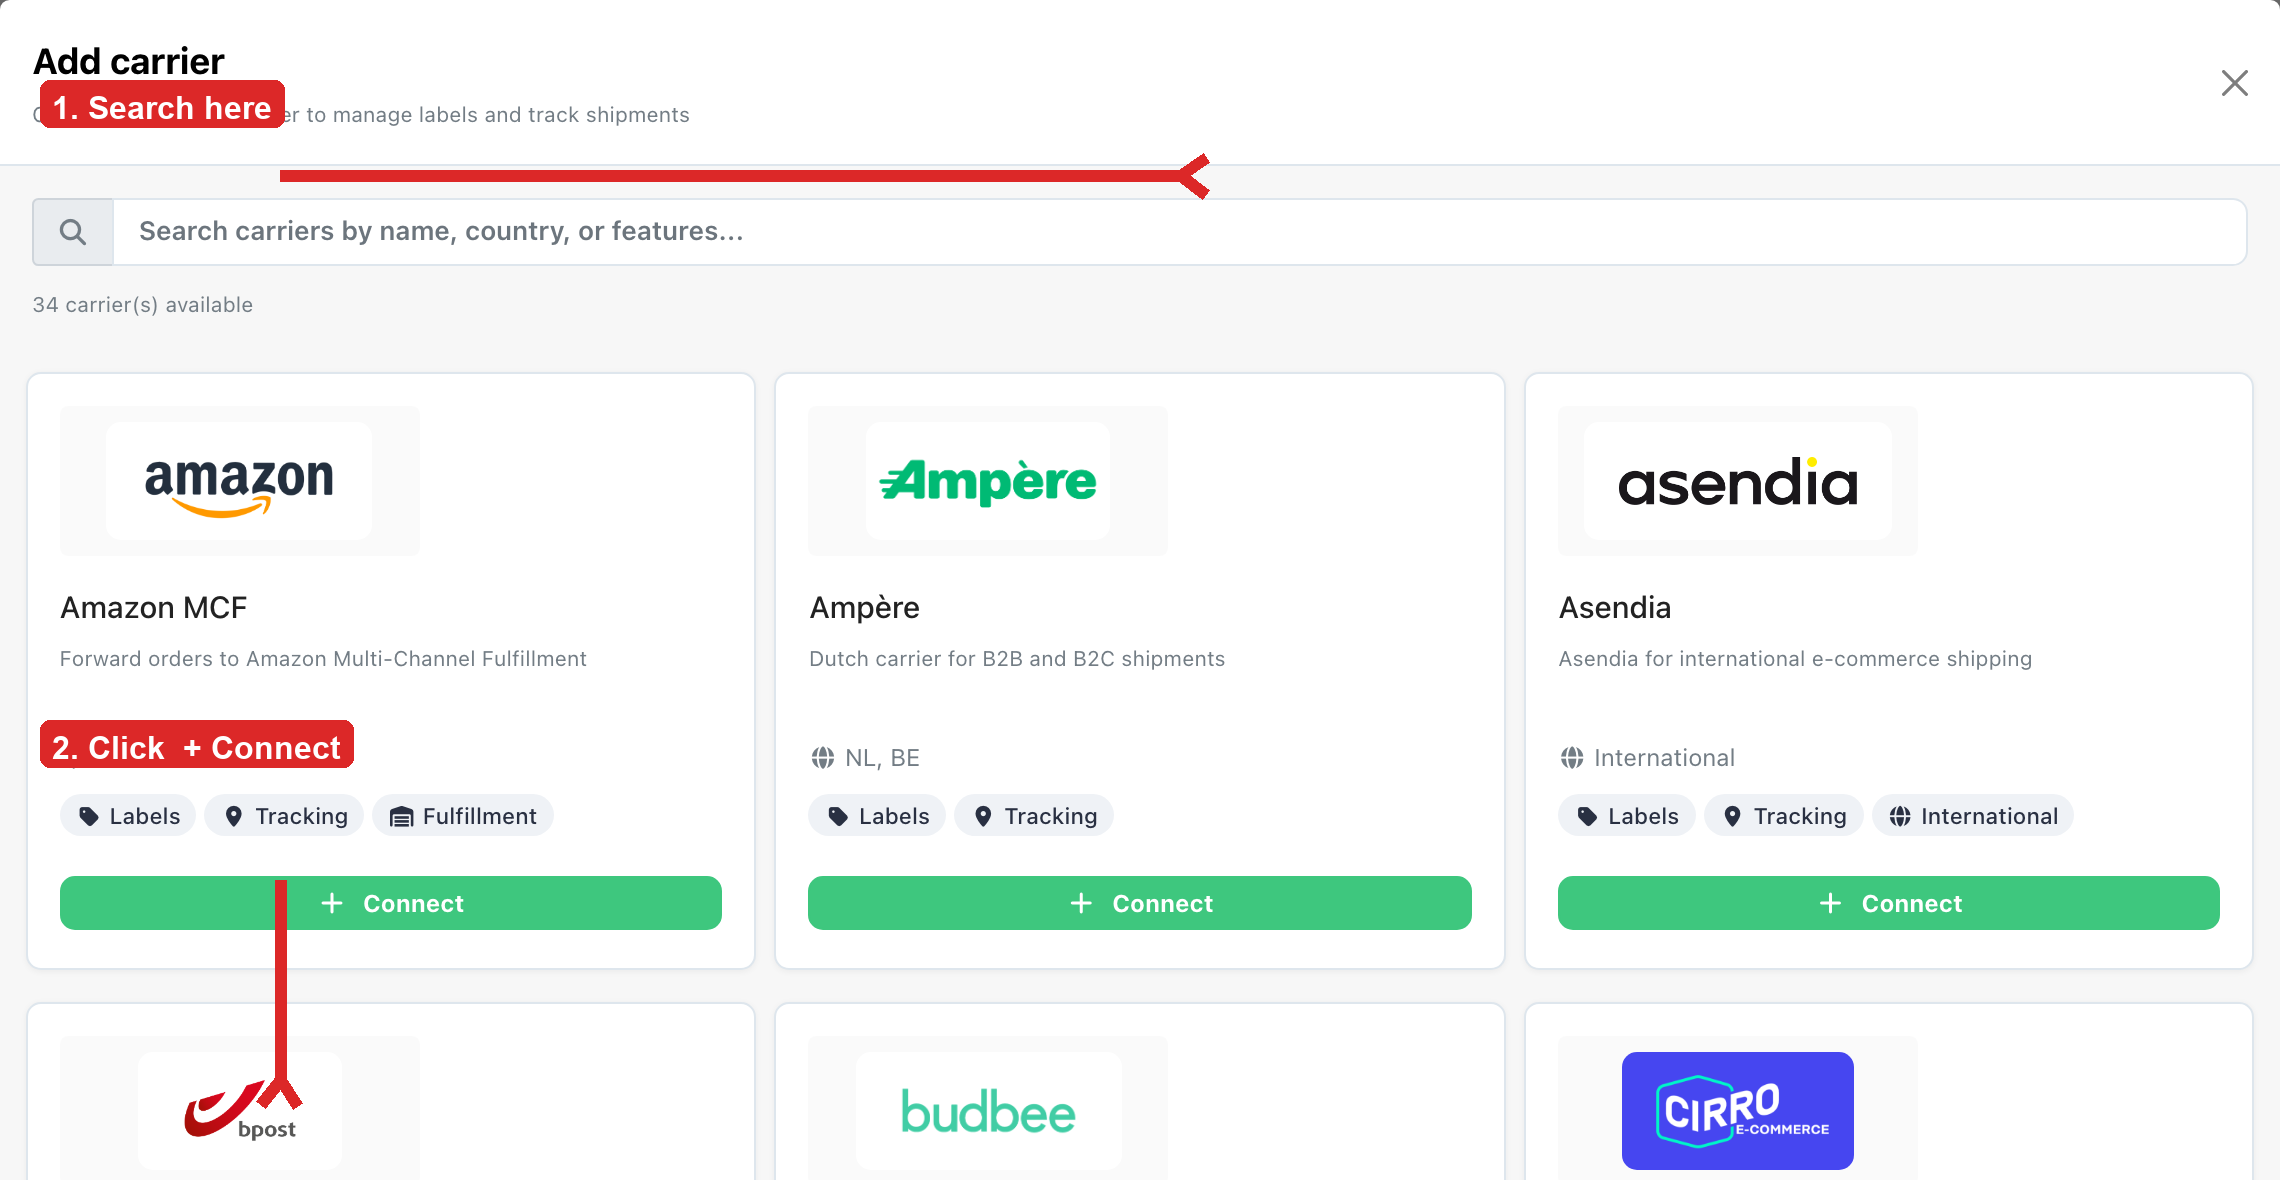
Search for the carrier, then click + Connect on its tile. Enter the API keys or login the carrier asks for.
Per-carrier steps: Shipping → Carriers.
Printers (PrintNode)
Use this so pick & pack can print labels and packing slips on warehouse printers.
-
Create a PrintNode API key first: Connecting PrintNode.
-
In ChannelDock go to Configuration → Settings → Printers.
-
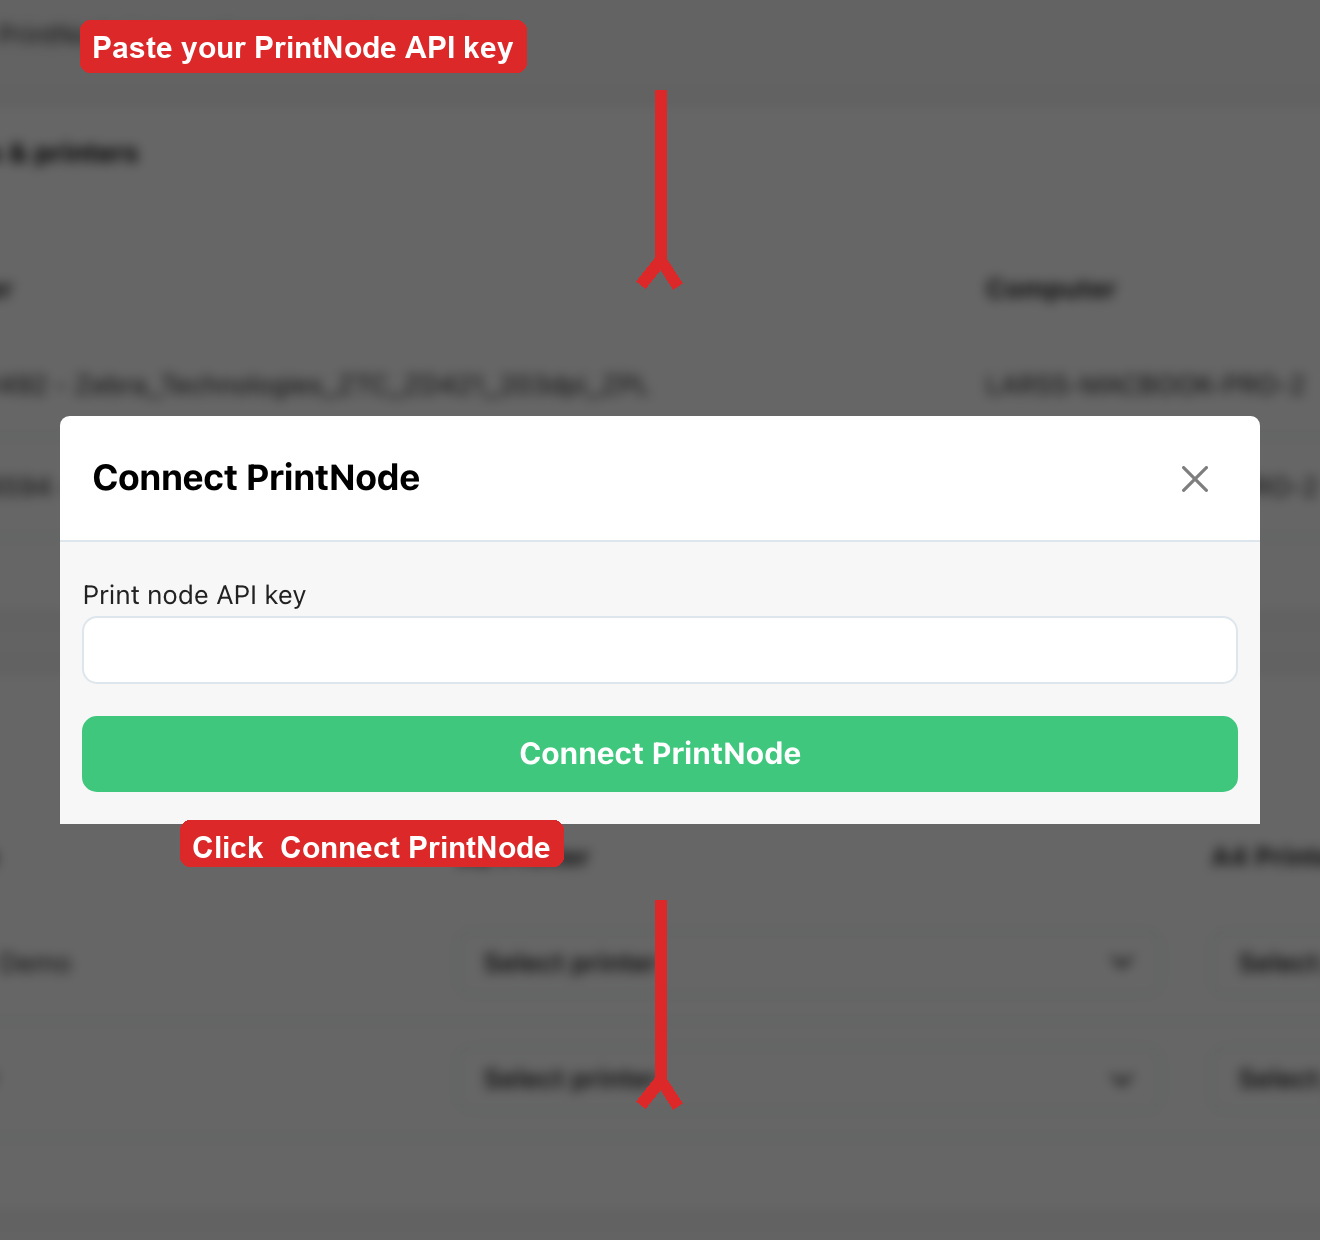
Click Connect PrintNode, paste the API key, then click Connect PrintNode again.
-
Assign an A6 printer (labels) and an A4 printer (packing slips) to each user.
If you already connected PrintNode, the page shows Delete PrintNode instead of Connect. Do not disconnect unless you intend to replace the key.
WMS integrations (JTL and others)
Carriers and PrintNode are not the same as a warehouse system such as JTL FFN.
- Go to Configuration → Settings → Integrations.
- Click the integration tile (for example JTL FFN merchant push or JTL FFN order import).
- Follow Connecting JTL Fulfillment Network (FFN) for tokens, invitation links, and the 401 error.
Was this helpful?